Kangchendzönga - Sunrise & Sunset Timelapses
Holy Grail Timelapse - Sunrise & Sunset
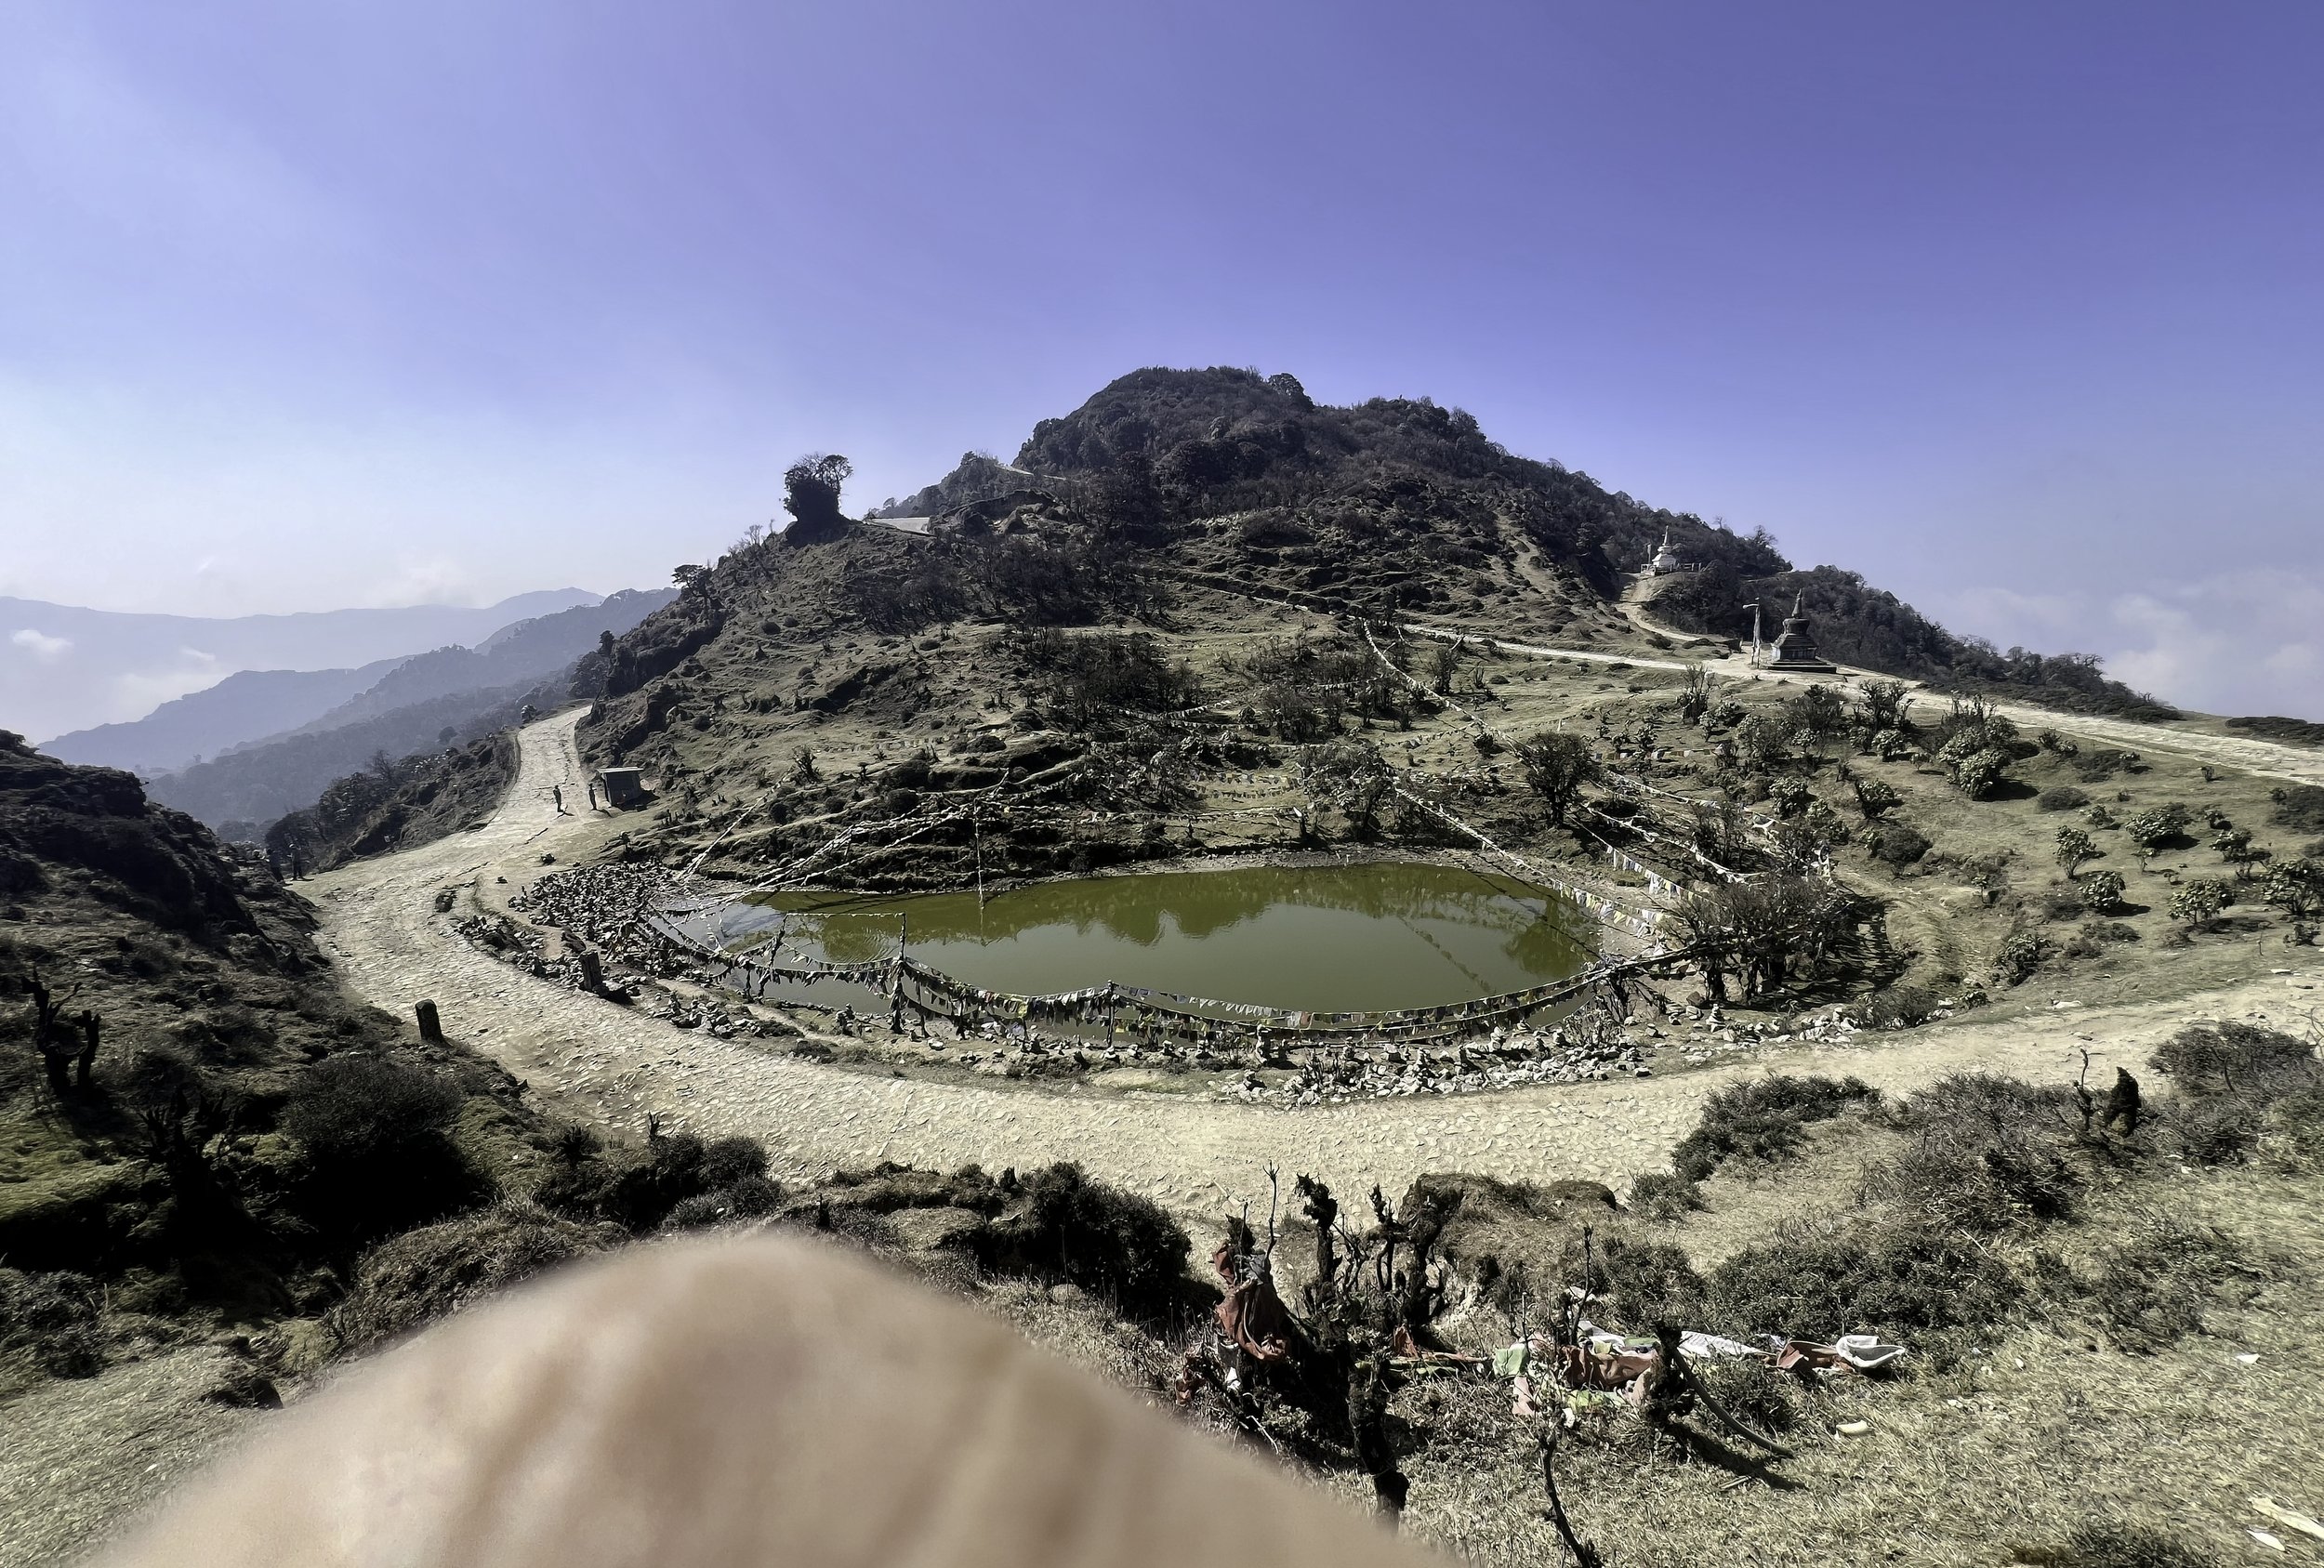
Singalila Ridge, West Bengal
“Anyone who has been among mountains knows their indifference, has felt a brief, blazing sense of the world’s disinterest in us. In small measures, this feeling exhilarates. In full form, it annihilates.”
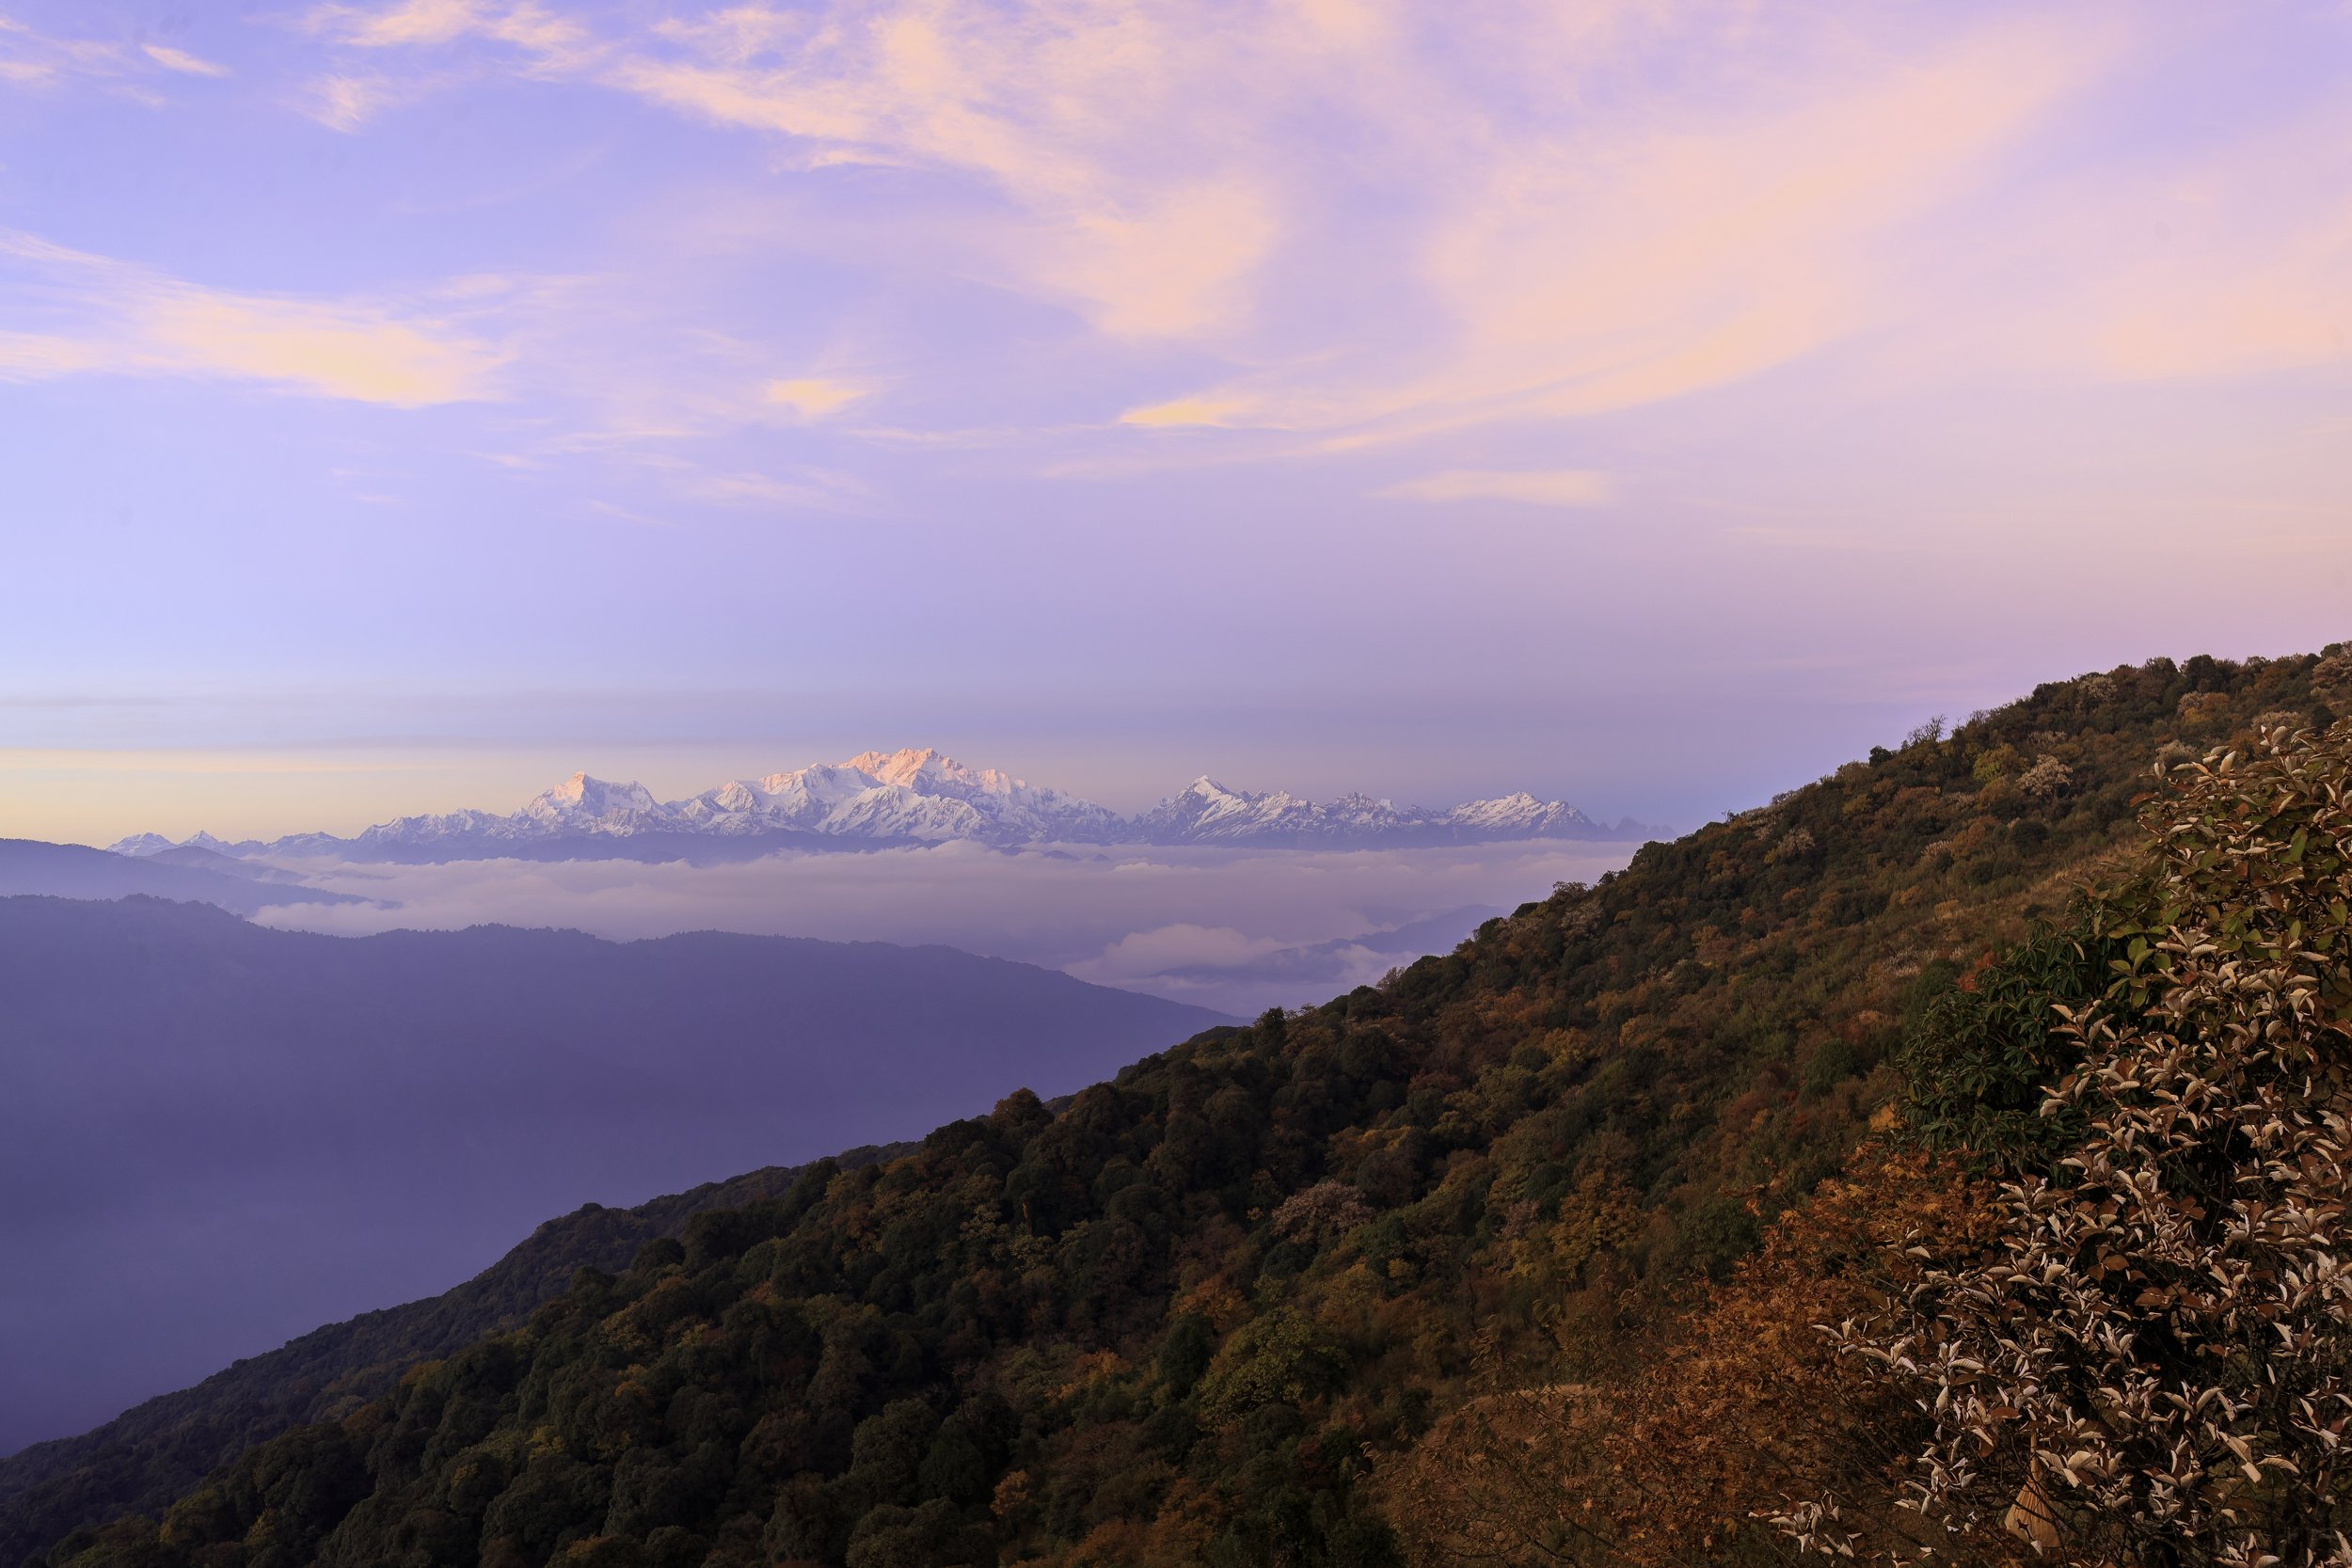
This quote perfectly elucidates my profound experience of feeling small and insignificant while I was standing at Tonglu facing these ancient mountains. It was a very spiritual feeling and actually brought me to (happy) tears. So my experience seems to fit with the first part of this quote - in small measures it exhilarates. But in full form, it annihilates.
After a few years longing I made my way back to the Singalila Ridge and spent a few days there feeling humbled by the mighty Kangchendzönga and the Himalayas. My plan this time was to spend time with the mountains and shoot some timelapses - Sunrise, Sunset, star trails, star motion, cloud inversions and many more - weather permitting.
Spectacular locations like the Singalila Ridge invariably make for some spectacular photographic opportunities. I was able to spend time shooting thousands of frames capturing the sunrises, sunsets and stunning star trails. Sunrise and Sunset timelapses are usually night to day or day to night timelapses - known as Holy Grail timelapses! They get the “Holy Grail” epithet because of just how insanely difficult they are to make given how quickly the light changes - SO DRAMATICALLY - from the beginning up until the end of the shoot. Luckily for us today, camera technology has caught up and it’s made shooting and editing a holy grail timelapse almost as simple as any ordinary timelapse.
I used my trusty Canon 1Dx Mark ii paired with some unusual choices for lenses this time - the EF 100-400mm f/4.5-5.6L IS II USM Lens, the EF 24-70mm f/4L IS USM, the EF 16-35mm f/4L IS USM and the Sigma 50mm f/1.4 DG HSM ART. The camera was usually perched on my ever reliable ProMediaGear sticks These legs have proved invaluable in keeping the cameras steady and handling the extreme temperatures and winds with aplomb making the timelapses easier to edit later.
Sunrise @ Tonglu
Exif: Canon 1Dx Mark ii | EF 24-70mm f/4L IS USM @ 47mm | f/4 | 5 seconds | ISO 100 | Manually focused at the Hyperfocal distance with WB set to 3800K | First of 1192 images @ 05:06 hrs.
A Panorama of 70 photos taken in the landscape mode but vertically oriented resulting in an image that is 17,761 pixels wide and 5303 pixels tall.
Location: 27° 1’ 54.39” N, 88° 4’ 8.598” E
Exif: Canon 7D Mark ii | EF100-400mm f/4.5-5.6L IS II USM @ 100mm | f/4.5 | 1/3200 seconds | ISO 100 | Manually focused at the Hyperfocal distance with AWB | As seen from Tumling @ 06:29 hrs
Sunset @ Tumling
Exif: Canon 1Dx Mark ii | EF16-35mm f/4L IS USM @ 35mm | f/4 | 1/20 seconds | ISO 100 | Manually focused at the Hyperfocal distance with WB set to AWB | First of 471 images @ 16:56 hrs.
The Singalila Ridge & Singalila National Park
The Singalila Ridge is a north–south mountain ridge running from northwestern West Bengal through Sikkim in the Indian part of the Himalayas. The district of Ilam in Nepal falls on the western part of this ridge. The ridge separates mountain ranges of West Bengal from other Himalayan ranges to its west. The two highest peaks of West Bengal, Sandakphu (3,636 m (11,929 ft)) and Phalut (3,600 m (11,800 ft)) are located on the ridge. The Singalila National Park encompasses the ridge. It is noted for its views of Kanchenjunga and Mount Everest. The trek from Manebhanjang to Sandakphu and Phalut is popular amongst adventure travelers, as is mountain biking.
The Singalila National Park is located on this Singalila Ridge at an elevation of more than 2,300 metres above sea level, in the Darjeeling district of West Bengal. The park was declared a wildlife sanctuary in 1986, and was made an Indian National Park in 1992. The Singalila area in Darjeeling was purchased by the British Government from Sikkim Durbar in 1882, and notified a Reserve Forest under the Indian Forest Act 1878. It was notified as a National Park in 1992 and was also officially opened up for tourism.
One of the greatest British botanists and explorers Joseph Dalton Hooker visited Singalila Ridge in 1849. Hooker's expedition was based in Darjeeling where he stayed with naturalist Brian Houghton Hodgson. Through Hodgson he met British East India Company representative Archibald Campbell who negotiated Hooker's admission to Sikkim, which was finally approved in 1849. Hooker explored with local resident Charles Barnes, then travelled along the Rangeet River to its junction with the Teesta River and Tonglu mountain in the Singalila Ridge on the border with Nepal. The park is part of the Eastern Himalayas with the Rammam river and Srikhola River flowing through the park. The park has no significant history of human settlement. However, small settlements have grown up along the trekking route to Sandakphu and Phalut. There is a reasonably large village at Kala Pokhri, around the lake of the same name. The Singalila Ridge was used as an approach route by the first documented mountaineering team which unsuccessfully attempted to climb Kanchenjungain 1905. The team was led by Jules Jacot-Guillarmod and the famous occultist Aleister Crowley.
The major issues at the park are trash collection on trekking routes and ensuring minimal damage of flora by trekkers, as flora at such high elevations tend to grow really slowly. Grazing of yak and cattle from neighbouring villages can also be a problem. Forest fires can be a threat to the park, especially in spring when the accumulated debris from winter can be a hazard. A forest fire swept through the park on 6 March 2006.
Even though the national park has a resident Red Panda population of only about 42 (in 2019) members, Project Red Panda (funded by the Central Zoo Authority) chose Singalila National Park for reintroduction of red pandas from its captive breeding program at the Padmaja Naidu Himalayan Zoological Park in Darjeeling, mainly due to reasons of proximity. Two females, Sweety and Milli, were released in November 2004. Milli was killed by a leopard, but Sweety adapted to the wild and gave birth to an offspring - the first such successful re-entry for red panda.
Tonglu
Located at 27.03°N 88.09°E Tonglu (3036 m or 10000 feet above mean sea level) is one of the higher peaks of the Singalila Ridge and a small settlement inside the Singalila National Park in the Darjeeling subdivision, Darjeeling district in the state of West Bengal in India near the India - Nepal border. It is a roadside halt along the trekking route from Manebhanjan to Sandakphu. It has a number of guest houses and homestays for faring trekkers and tourists on their way to Sandakphu. It was also known as Tonglo in the 1800s. Sir Joseph Dalton Hooker carried out many plant hunting expeditions in Darjeeling and Sikkim.
Tumling
Located at 27.0315° N, 88.0689° E Tumling is a small hamlet in Jogmai VDC, Ilam District of Nepal. A tourist attraction in Eastern Himalayas at an altitude of 2970m (9,744 ft). its population is composed mostly of Gurung families, with the total population being a mere 15 in number. It is roughly 35 minutes' walk from Meghma and close to Darjeeling. It is roughly 10.5 km uphill from the town of Manebhanjang and is a common stop for the trekkers going up to Sandakphu.
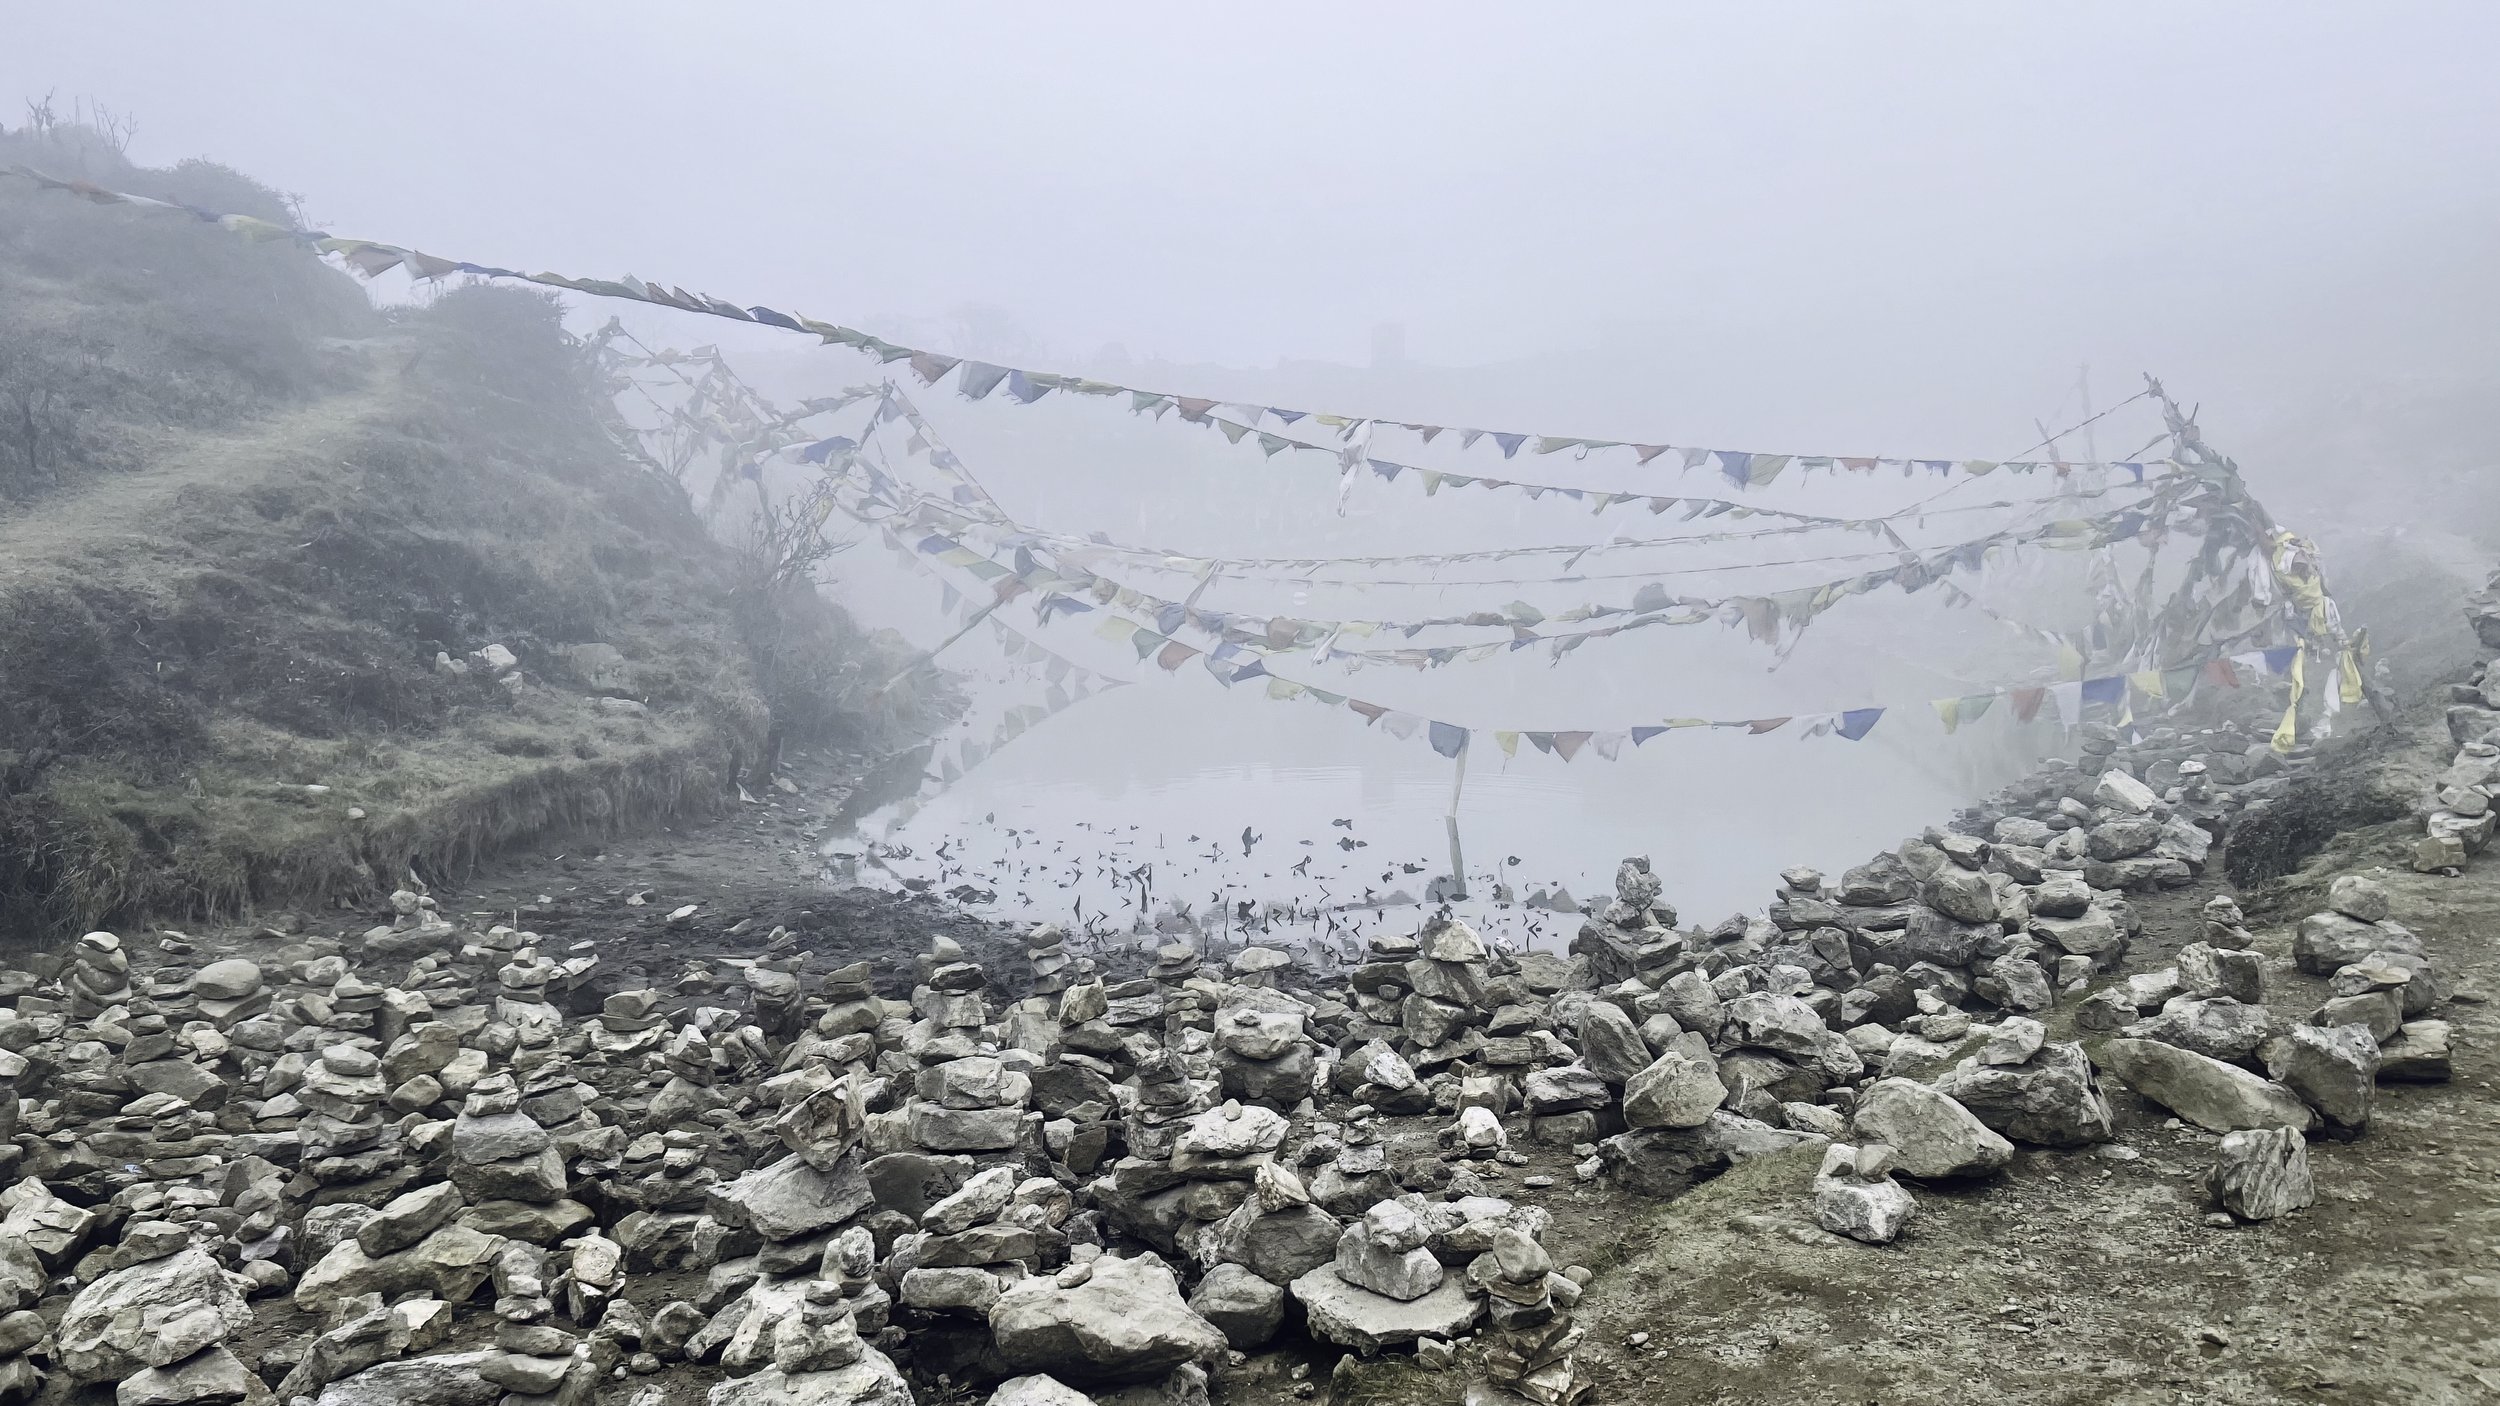
Tumling is also famous for its picturesque landscapes and beautiful sunrises and sunsets. Days just fly by exploring the village, enjoying the fresh mountain air, and taking in the stunning views of Mt. Kanchanjungha and other ranges. Between March and April the mountain sides are vibrant with blossoms of Rhododendrons, Magnolia and Orchids. The local monastery of Kagyu sect of Tibetan Buddhism is perfect for views like the one below.

The view from the Tumling Monastery (Kagyu sect of Tibetan Buddhism) with our offerings and Prayer Flags.
Kangchendzönga - the Sleeping Buddha Peaks
The "Sleeping Buddha" formation in the Kanchenjunga range, which is a silhouette resembling a reclining Buddha, is visible from multiple locations on the Sandakphu trekking trail. The Sleeping Buddha formation is particularly prominent when viewed from Sandakphu, a village on the summit of a ridge that offers a clear view of the Kanchenjunga massif, Tonglu & Tumling. The Sandakphu-Phalut trek allows for a long ridge walk with views of the Sleeping Buddha and other high peaks. In my video I have listed the peaks that make up the Sleeping Buddha with their altitudes as seen from the village of Tonglu.
I intend to return again and explore more areas deeper and higher in the park where there is literally no light pollution - Bortle 1-2 skies.
The Kanchenjunga Sleeping Buddha peaks seen from Sandakphu
To shoot a time-lapse in the Himalayas, prepare for challenging conditions, including altitude sickness, extreme temperatures, and limited oxygen, while utilizing appropriate equipment and planning for long-term projects, such as using multiple cameras, batteries, and time-lapse remotes.
Some Challenges and Considerations:
Altitude: The Himalayas are at high altitudes, leading to potential altitude sickness. Acclimatize properly and be aware of the symptoms and take steps to mitigate them. The last time I was here I had a severe headache for the first two days.
Extreme Temperatures: Expect very cold temperatures, especially at night and at higher elevations. Pack warm clothing and consider hand warmers. On this trip I had a tough time on the first night as I was still acclimatizing and wasn’t used to the cold. I was sitting out almost the entire night shooting star trails and the wind chill eventually got to me. Also the cold reduces the life of the batteries so something that lasts 8 hours at sea level might last only a few hours in the cold.
Limited Oxygen: The air is thin at high altitudes, which can make breathing difficult. Be prepared for this and take necessary precautions.
Logistical Difficulties: Access to remote areas can be challenging, and finding suitable locations for time-lapse photography may require trekking or using local transportation.
Weather: Himalayan weather can be unpredictable, with sudden changes in temperature and visibility. Be prepared for all types of weather conditions. The day I did the Sunrise timelapse, the rising sun brought with it dense fog and everyday after including the night I did the Milky Way Timelapse I was fogged in with visibility reduced to a few feet. The night of the Milky Way timelapse, the camera was shooting outside through the night and by morning everything was soaking wet because of the dense moist fog rolling up from the valley.
Safety: Be aware of the dangers of the mountains, including avalanches, crevasses, and falling rocks. Hire experienced guides and take necessary safety precautions. Thankfully safety is not really an issue on the ridge and the neighbouring areas and I had the support of the locals on this trip which simplified things considerably. I will be eternally grateful to Amardeep Thami (Phone), Roshan Rai & Sanjay Pariyar for catering to my whims and waking up at weird hours to take me to the locations I wanted to be at for the timelapses.
Permits and Regulations: Be aware of any permits or regulations that may be required for photography in the area.
The Holy Grail Timelapse
Sunrise and sunset are the golden hours of timelapse photography, and the most beautiful way to capture them is using the “Holy grail technique”. But why is this technique called the Holy Grail? The “Holy Grail” epithet simply signifies just how insanely difficult it was to make such a timelapse given how QUICKLY and more crucially how DRAMATICALLY the light changed from the start of the timelapse to its end. Luckily for us today, camera technology has caught up and it has made shooting and editing a holy grail timelapse almost as simple as any ordinary timelapse especially if you have the tools to facilitate.
The key to getting a holy grail timelapse is remembering why you are even shooting it in the first place. You want to see the scene change, and in this case the light as well. So when you are on the location, ask yourself what the most interesting thing on the scene is. Your composition rules like the rule of thirds and symmetry are going to be great rules of thumb to follow. But you may also want to have your viewer follow the path of the sun. TV shows will often use a sunset time lapse to transition into nighttime. This is a great visual cue.
What makes a good holy grail timelapse is often going to be the nice beautiful colours of the sky, the dramatic change of light in such a short time, the passage of clouds over a wide landscape where their shadows travel across the land. Or the silhouettes of mountains or buildings. Or maybe a setting where a city turns to life after sunset, or wakes up after a sunrise. The best ones are going to combine the above with great composition. This is going to come with practice because planning and shooting a sunset time lapse are a bit tricky.
So how does one go about shooting the Holy Grail of timelapses?
ALWAYS shoot RAW, as they contain way more data than JPEG files
Turn off image stabilisation (IS) in your camera and lens.
Focus manually preferably at the Hyperfocal distance so you have everything from Minimum focus distance to infinity acceptably sharp.
Ensure the camera is in Manual Mode or Aperture Mode. Aperture Priority mode is a semi-automatic mode giving us the most flexible shooting options and is very reliable. Aperture priority mode will change all the camera settings in the shoot EXCEPT the aperture. This can help reduce the flicker if one is uncomfortable doing it manually.
ISO - I usually tend to start my sunset timelapses from ISO 100. Sunrises will depend on the ambient light available and the combination of aperture, shutter and ISO to get the best exposure.
White Balance - I’ve tried both AWB and setting a manual WB and the choice usually depends on how much time I have before I start shooting. Since I shoot in RAW I can always modify and match the WB while I am editing. But usually setting the WB manually helps to understand what the temperature at the time was vs what I remember after.
Take time and GET the correct exposure for the first image - choose the aperture you want, choose the ISO you want to start at and work out the best shutter speed to get the perfect exposure - whites are not blown out and the shadows are not crushed. This makes everything that follows easy to manage.
Use an intervalometer and choose the Interval between the frames. This depends on how fast the sun is setting or will disappear from view. Preferably at least 6 - 5 secs and make sure the intervalometer runs an infinite amount of times.
Last but not the least, make sure the battery is fully charged, and the memory card is empty to avoid any problem while storing.
Hyperfocal Distance
Hyperfocal distance can be a confusing topic, both for beginning and expert photographers. However, if you want to take the sharpest possible images, particularly landscape photographs, it is simply invaluable. Here are a couple of websites that explain in elaborate detail what the Hyperfocal distance is and how it can be leveraged to make the most of the depth of field — thereby producing a more detailed final print. However, knowing the hyperfocal distance for a given focal length and aperture can be tricky.
PhotographyLife Cambridge in Colour
And my favourite resource for all things timelapse - Gunther Wegner’s LRTimelapse. He also has a number of tutorials here.
But first things first, what exactly is a time-lapse? It is a technique that allows us to take a series of photos and put them together sequentially to create a video. The frames are taken with the same settings over an extended period of time and when put together show movement from the same perspective in a sped-up fashion. Basically speeding up the passage of time - Time Travel!
Timelapses can be created using almost any camera and off late most recent DSLR/mirrorless cameras have a "time-lapse mode" which allows one to create a time-lapse very easily without any editing. Once activated, one just has to point the camera to the subject, focus, and launch! Me - I prefer the old fashioned way because it gives me more control - especially over the flicker.
Along with the list I mentioned above there are some additional pieces of gear required
A wide angle or telephoto lens which will give a nice wide field of view or help to zoom into details.
An intervalometer which will help to control the intervals and exposure times. Some modern cameras have built-in intervalometers but I think an external one still provides more flexibility.
A sturdy tripod which is self explanatory as you need a stable base and avoid any shake caused by wind or uneven ground.
A Ball Head or any other head to get to the angle required.
Finally the interval - A time-lapse interval determines how often the camera takes pictures. The more photos you take, the smoother the movements in your time-lapse will look. If you are going to be shooting for hours, the interval doesn’t have to be that short. The longer the interval is, the less overwhelmed the camera will be over a long period. Also keep your camera battery and memory in mind when you set an interval. For sunrise or sunset timelapses it is crucial to determine the right interval because the sun can be deceptively quick while rising and setting. It is basically dictated by the Lens and Camera combination and how much time they allow for maximum signal acquisition. Also it is best to shoot in RAW and Manual Mode although it isn’t necessary. It’s just that RAW and Manual modes give the maximum control over all variables. The shutter speed depends on one’s creative preferences. Slow shutter speed is ideal for star-trail timelapses.
For a Milky Way timelapse from very light polluted areas read my blogs - Lights of the Night Sky & Nirmal - Chasing the Milky Way & Meteors. I have also done a Milky Way timelapse here from the village of Jaubari, which I will upload soon.
There is a ton of material and innumerable tutorials on how to shoot timelapses, best ways, easy ways to shoot the holy grail timelapses. I will not go into those details as they have already been done in a terrific amount of detail. All I will say is that if this hits a chord with you then please feel free to reach out and we can discuss more or just keep practising till you get to where you want to be.
Here are some timelapses I have included in my gallery. There are quite a few more which I haven’t yet uploaded here but will do so soon.


Related Posts