
Milky Way Timelapse - Jaubari
Milky Way Timelapse Photography in ZERO Light Pollution
Jaubari, Ilam, Nepal
After seeing and recording some mesmerizing sunrise and sunset timelapses (Blog, Video) and the gorgeous multicoloured star trails from Tumling on the Singalila Ridge (Blog, Video) we made our way to Jaubari, a tiny hamlet 45 minutes hike away. Jaubari is tucked away just beyond the ridge and at a slightly lower altitude with views to the South completely free of any obstructions. I had planned to do some Milky Way Timelapses during my stay here but apart from the first night I was completely fogged out on all the nights I was here. What you see is the timelapse from my first night at Jaubari.
Milky Way photography is a timeless way to capture the natural beauty of our galaxy. However, a photograph isn't the only way to keep the memory, it is also possible to create a time-lapse video of the night with a series of photos. A timelapse helps provide a real sense of how large and beautiful the band of the Milky Way looks as it crosses the night sky in video format. In this blog I have elaborated on how to plan, gear and settings I have used to get my photos. These photos have then been compiled into a time-lapse to create the video you eventually see. A time-lapse is another way of telling the story of what happened that night but making a timelapse of the Milky Way moving across the sky isn’t just about pointing a camera at the sky and taking a series of photos. There is a method that requires some serious preparation and dedication especially when it is cold and windy and more so in the conditions you see here.
Timelapse photography is demanding and time-consuming even in daylight, but the challenges are dialed up to 11 at night — every shot takes a lot longer, and creating a timelapse requires many individual photos for every one second of video (24, 25, or 30 are all typical frame rates - I use 24 fps). It is a matter of patience, a lot of patience, and persistence especially when Mother Nature does not want to oblige.
And like I said in my blog last week a clear sky is one of the most important things to watch for when planning a Milky Way Timelapse or a Star Trails photo. In order to get a spectacular timelapse a perfectly clear sky for the entire duration of the shoot is preferred. But sometimes Mother Nature has its own designs and all one can do is be patient and persist. I would recommend using Dark Site Finder to help pick a good location. The great thing about this genre is that you do not need a completely dark sky to get a beautiful image. Even in light polluted areas, you can still capture a great Milky Way Timelapse and trying it during a full or any phase of the moon means the foreground will be well lit depending on the phase. But the presence of the moon can also become a challenge - if it is too bright it tends to wash out the Milky Way rendering it nigh invisible.
For insights into how star trails or even Milky Way photos look from Light Polluted skies click on the links below to read more.
Milky Way Rising with the Moon
Exif: Canon 1Dx Mark ii | EF16-35mm f4L IS USM @ 16mm | f/4 | 19 seconds | ISO 800 | Manually focused with a Bahtinov Mask & WB set to Manual at 3800k.
Timelapse Start: 21:17:14 | Timelapse End: 04:24:43 | Total Duration of shoot: ~ 07 hours 08 minutes | 1256 images processed in LightRoom and timelapse created in Premiere Pro
The Milky Way is a barred spiral galaxy and not only is it a huge accumulation of stars, but it also holds planets, asteroids, meteors, comets, and other solar remnants. Most stars are at the center of the galaxy with a few at the outer edges. The galactic center is home to a supermassive black hole - Sagittarius A*. Most galaxies are similar to the shape of a discus. Based on their visual appearance, Edwin Hubble developed a classification scheme for galaxies.
The three classes of galaxies are:
Ellipticals
Lenticulars
Spirals
The Milky Way is a flattened disk with spiral arms and is rotating In a clockwise direction making it a barred spiral galaxy. This disk contains dust, stars, and gas rotating from a center point. According to the Hubble Galaxy classification scheme. The est. size of the Milky Way ranges from 100 – 200 thousand light-years across and the estimated number of stars ranges from 100 – 300 billion. It is a large object but is not as big as our neighbour the Andromeda Galaxy - another spiral galaxy housing about 1 trillion stars making it more than double or even triple the stars compared to the Milky Way. The Andromeda Galaxy is on a collision course with the Milky Way due to its gravitational pulls but this won’t happen for another 4 billion years.
Shape of the Milky Way
Solar System within the Milky Way
Our Solar System is located specifically within a spiral arm of the Milky Way called the Orion Arm (also known as the Orion Spur). This arm is a smaller, partial arm situated between the larger Perseus and Sagittarius arms. Our Solar System is approximately 27,000 light-years from the Galactic Center. On the grand scale, the universe holds a mammoth collection of galaxies like the Milky Way. And of the estimated 200 billion stars our sun is one and it includes our solar system as well. Within the vastness of the Milky Way galaxy, the Sun’s gravitational pull governs the motion of the planets in our solar system, shaping the orbits and dynamics that define our cosmic neighborhood.
“The Milky Way is in the northern hemisphere only in the summer. In the winter, it is in the southern hemisphere.”
The Bortle dark-sky scale (usually referred to as simply the Bortle scale) is a nine-level numeric scale that measures the night sky's brightness of a particular location. It quantifies the astronomical observability of celestial objects and the interference caused by light pollution.
The Milky Way is a dim object, but can be photographed fairly easily, especially in the summer. However, to see it at its best, the dark-sky quality matters most. Only in dark enough skies can you truly get a great visual of the Milky Way. Therefore, it is crucial to find a dark location for the photographs or the time-lapse, as well as some other considerations. From the northern hemisphere, the Milky Way is best visible from mid-June to July. In July, the Milky Way core is at its peak. And from November through January, only the outer band is visible. To locate the Milky Way, a number of mobile apps are available such as Star Walk 2 & Stellarium - the two I use. Another important factor to consider is the moon. It is best not to plan to shoot during a full moon, as it will overpower the light from the stars. Instead, plan for when there is no moon or when there’s only a small crescent. You certainly don’t want to be fooling around in the dark trying to figure out where the galaxy is going and how to focus. Ideal locations will obviously have as little light pollution as possible. I have always used the website Dark Sky Finder to help locate the areas with the least amount of light pollution based on the Bortle Scale. This is a free to use service and works extremely well.
The Bortle Scale is shown here on the right and illustrates the brightness of the night sky at a particular location.
Main points for finding dark sky locations:
Escape Light Pollution
Choose a Safe Location & Visit in the Daytime
Find the Perfect Foreground
Prepare for the Evening
It is also a good idea to determine where in the sky the Milky Way is oriented at the particular location and time of year. Apps like PhotoPills make this extremely easy, and will even help to track where the Milky Way starts and ends in the sky. Always time the shoot around the lunar phases of the month, specifically the new moon. Shooting the day before, day of, or day after the new moon means there will be little to no ambient light from the moon affecting your scene, i.e. near total darkness. This can be stretched to one week before and after the new moon. Also note the respective times for sunrise and sunset during these dates and plan on shooting two hours AFTER sunset and ending at least one to two hours before sunrise. Finally, the weather. Always check the local weather conditions and obviously try to avoid rain or cloudy nights as this will not bode well for the gear or stars. The night I shot my timelapse you can clearly see how foggy it got through the night and by the time I decided to stop my timelapse - Astronomical Dawn - everything was soaking wet. I had to leave the entire kit outside during the day to get it to dry. I could not afford to take it in and wipe it down because it was about 5°-6° Celsius outside while indoors was around 20° Celsius. Taking the camera in would have gotten moisture inside the camera so I left it out to dry naturally.
Next, scout out potential compositions in the area. The best method that works for me is when I arrive EARLY and scout for possibilities relative to where the milky way is oriented. The three components of an effective composition for time lapses are foreground, subject, and moving objects. Including an up close object such as an interesting rock will help accentuate the motion across the frame if sliders are used. And in case of not using a slider, having a foreground subject always helps as it establishes depth within the image and begins the viewers journey to the subject. Now it may seem that the Milky Way would be the subject and this certainly may be the case, but it is best to have another stationary object mid frame (such as a mountaintop lookout) to again, provide additional depth within the image and accentuate the movement of the galaxy further. Finally, find the galaxy and try and narrow down its orientation and expected movement throughout night beforehand and peg the compositional elements relative to this. Ideally, the Milky Way should move from left to right in the sequence as the night progresses.
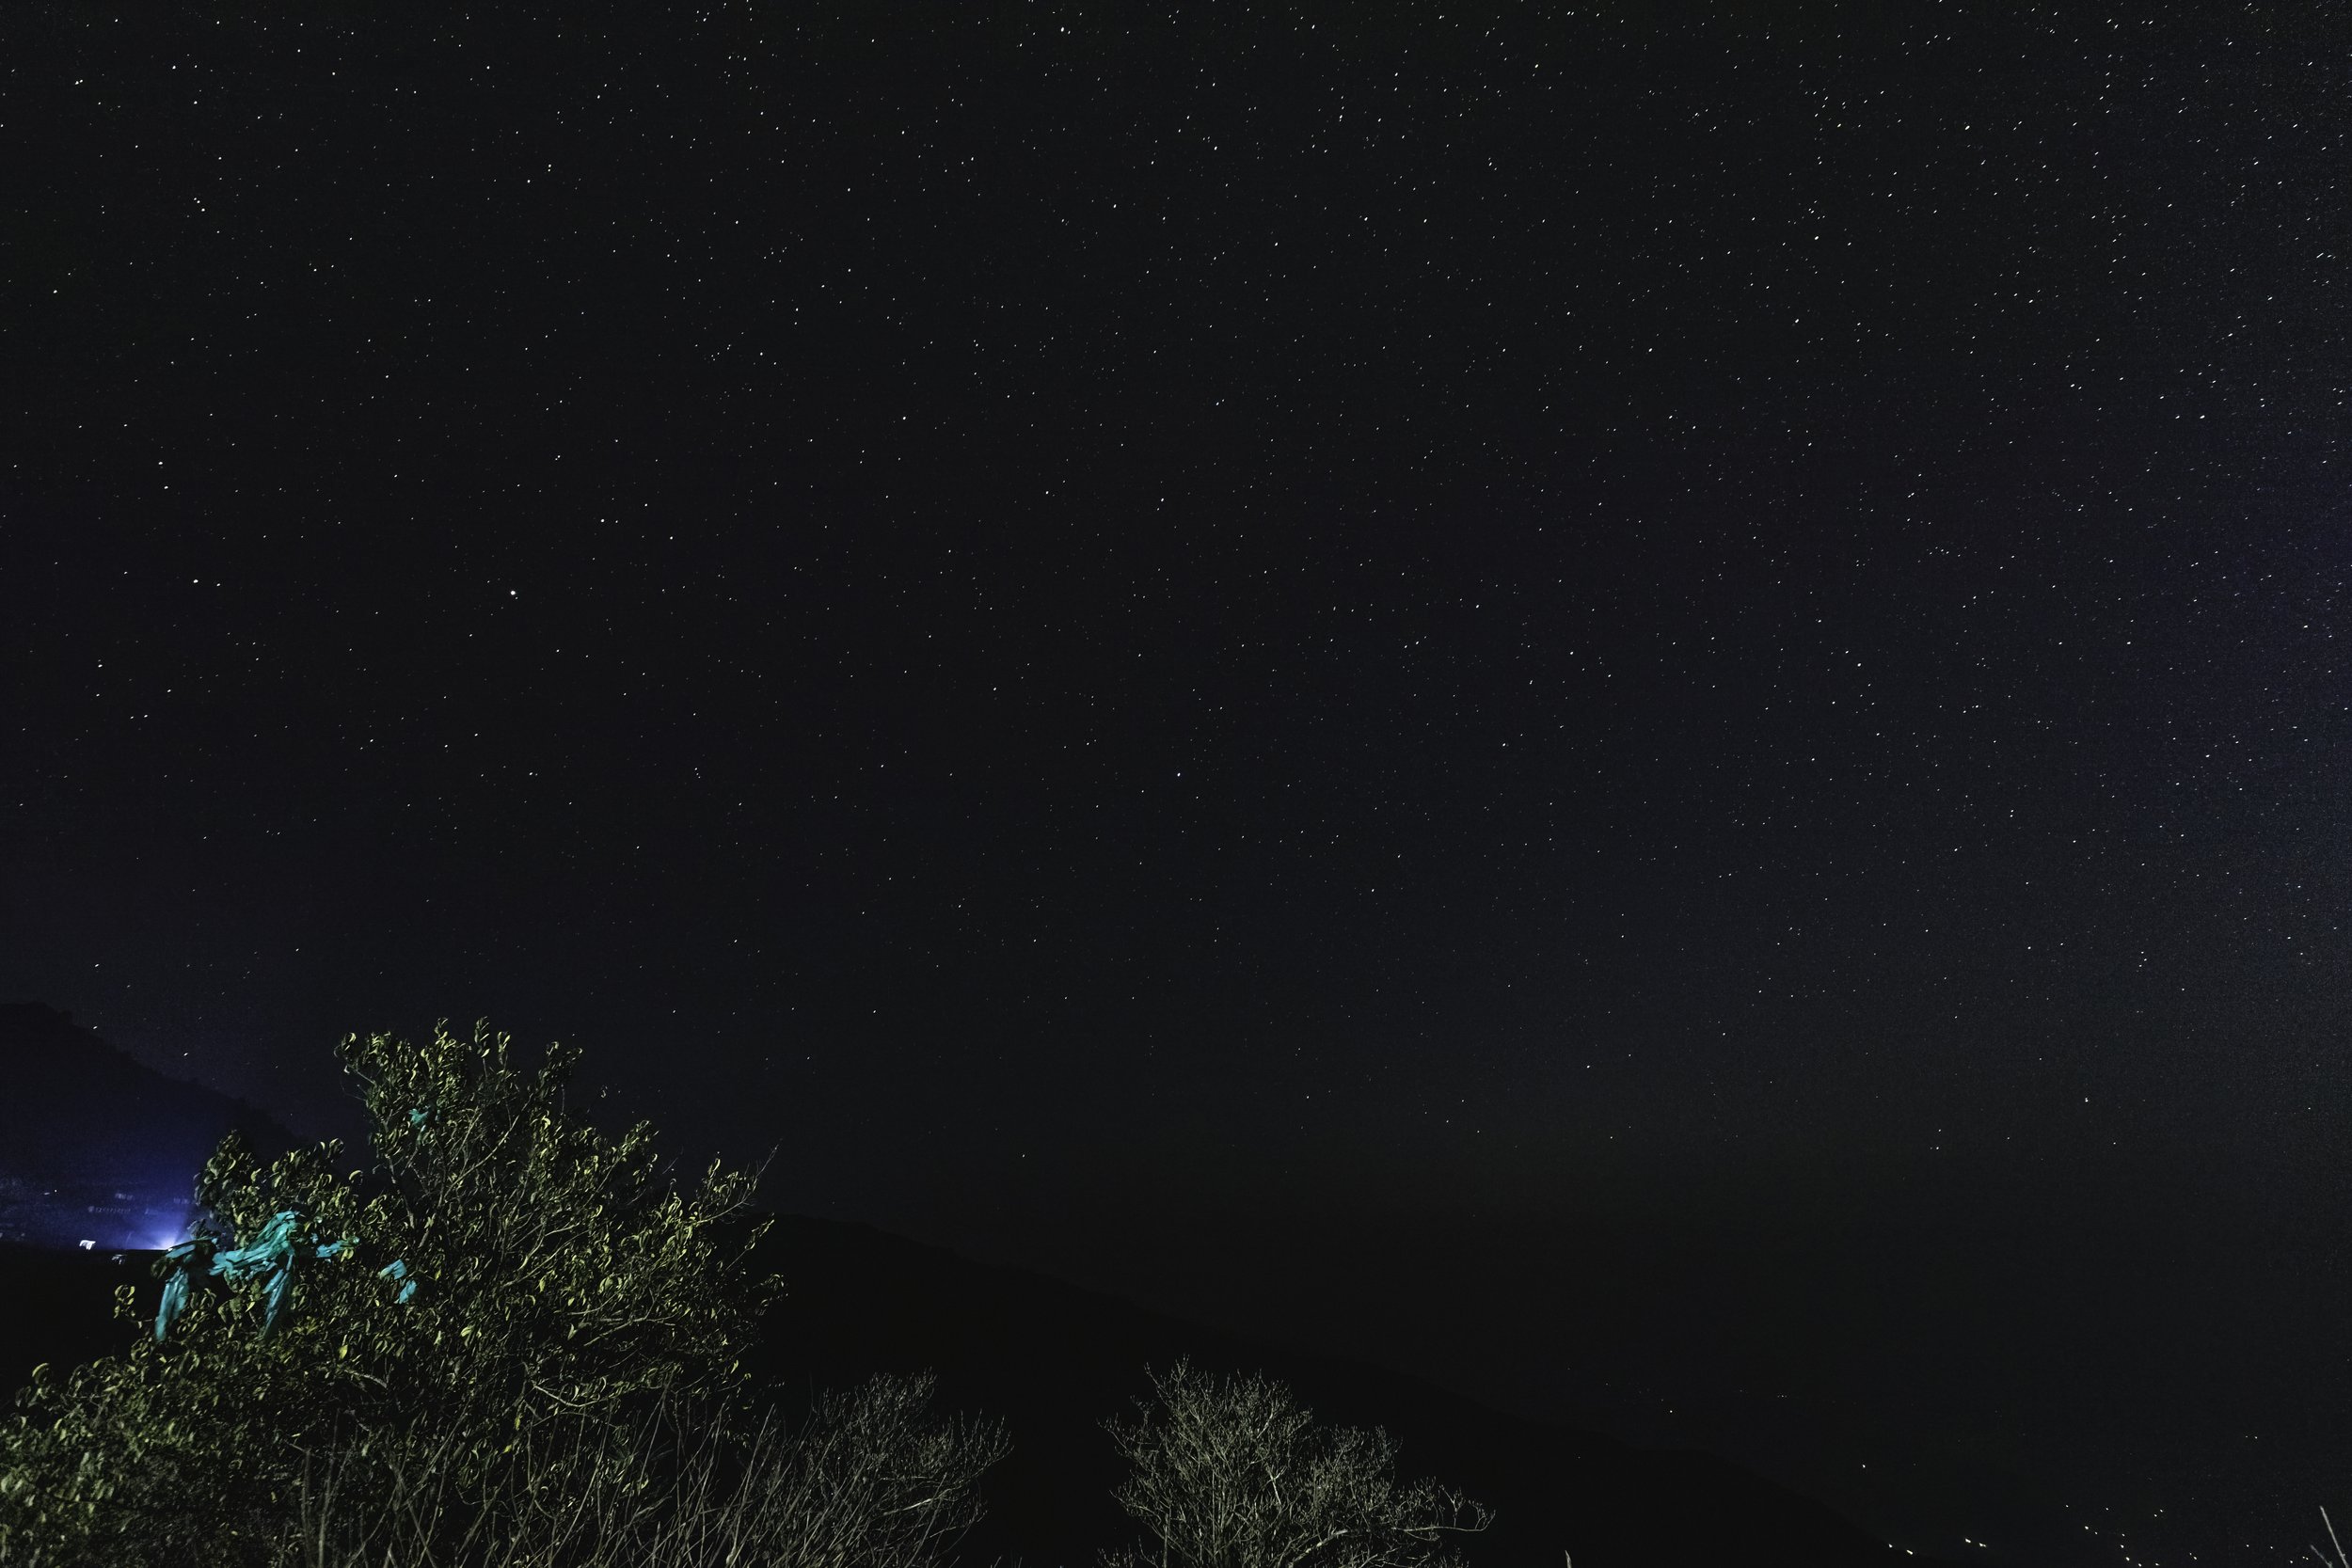
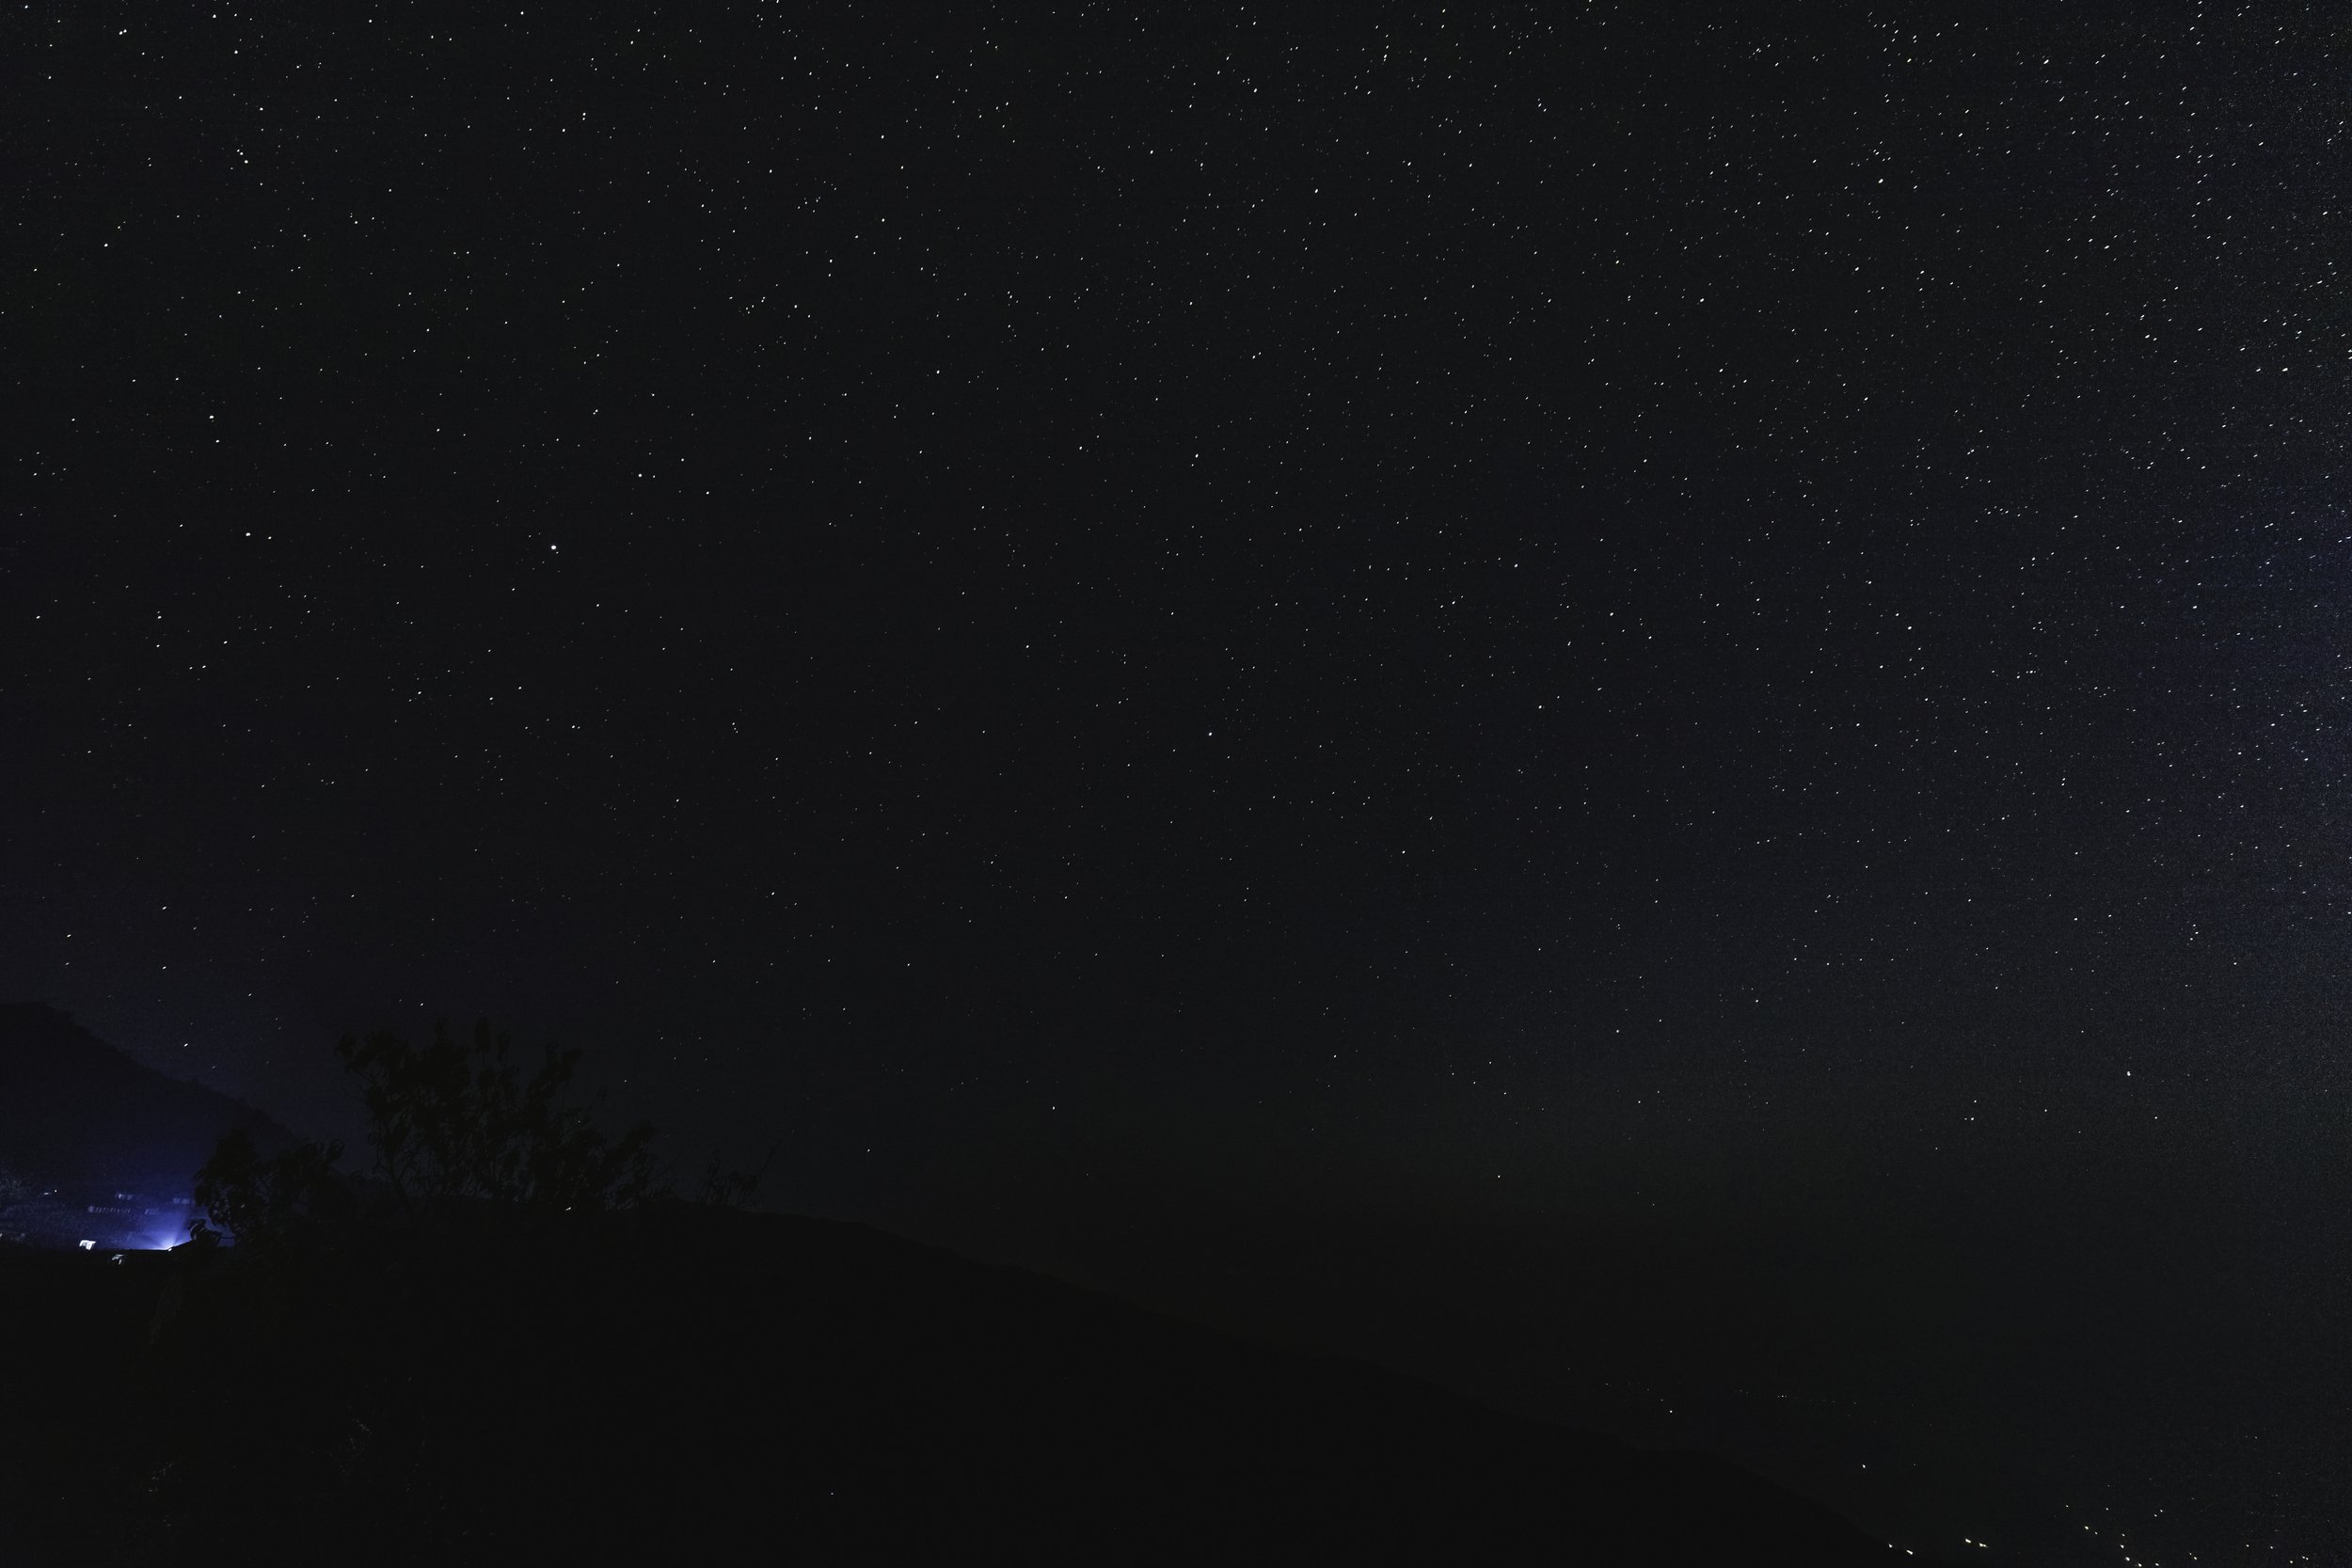
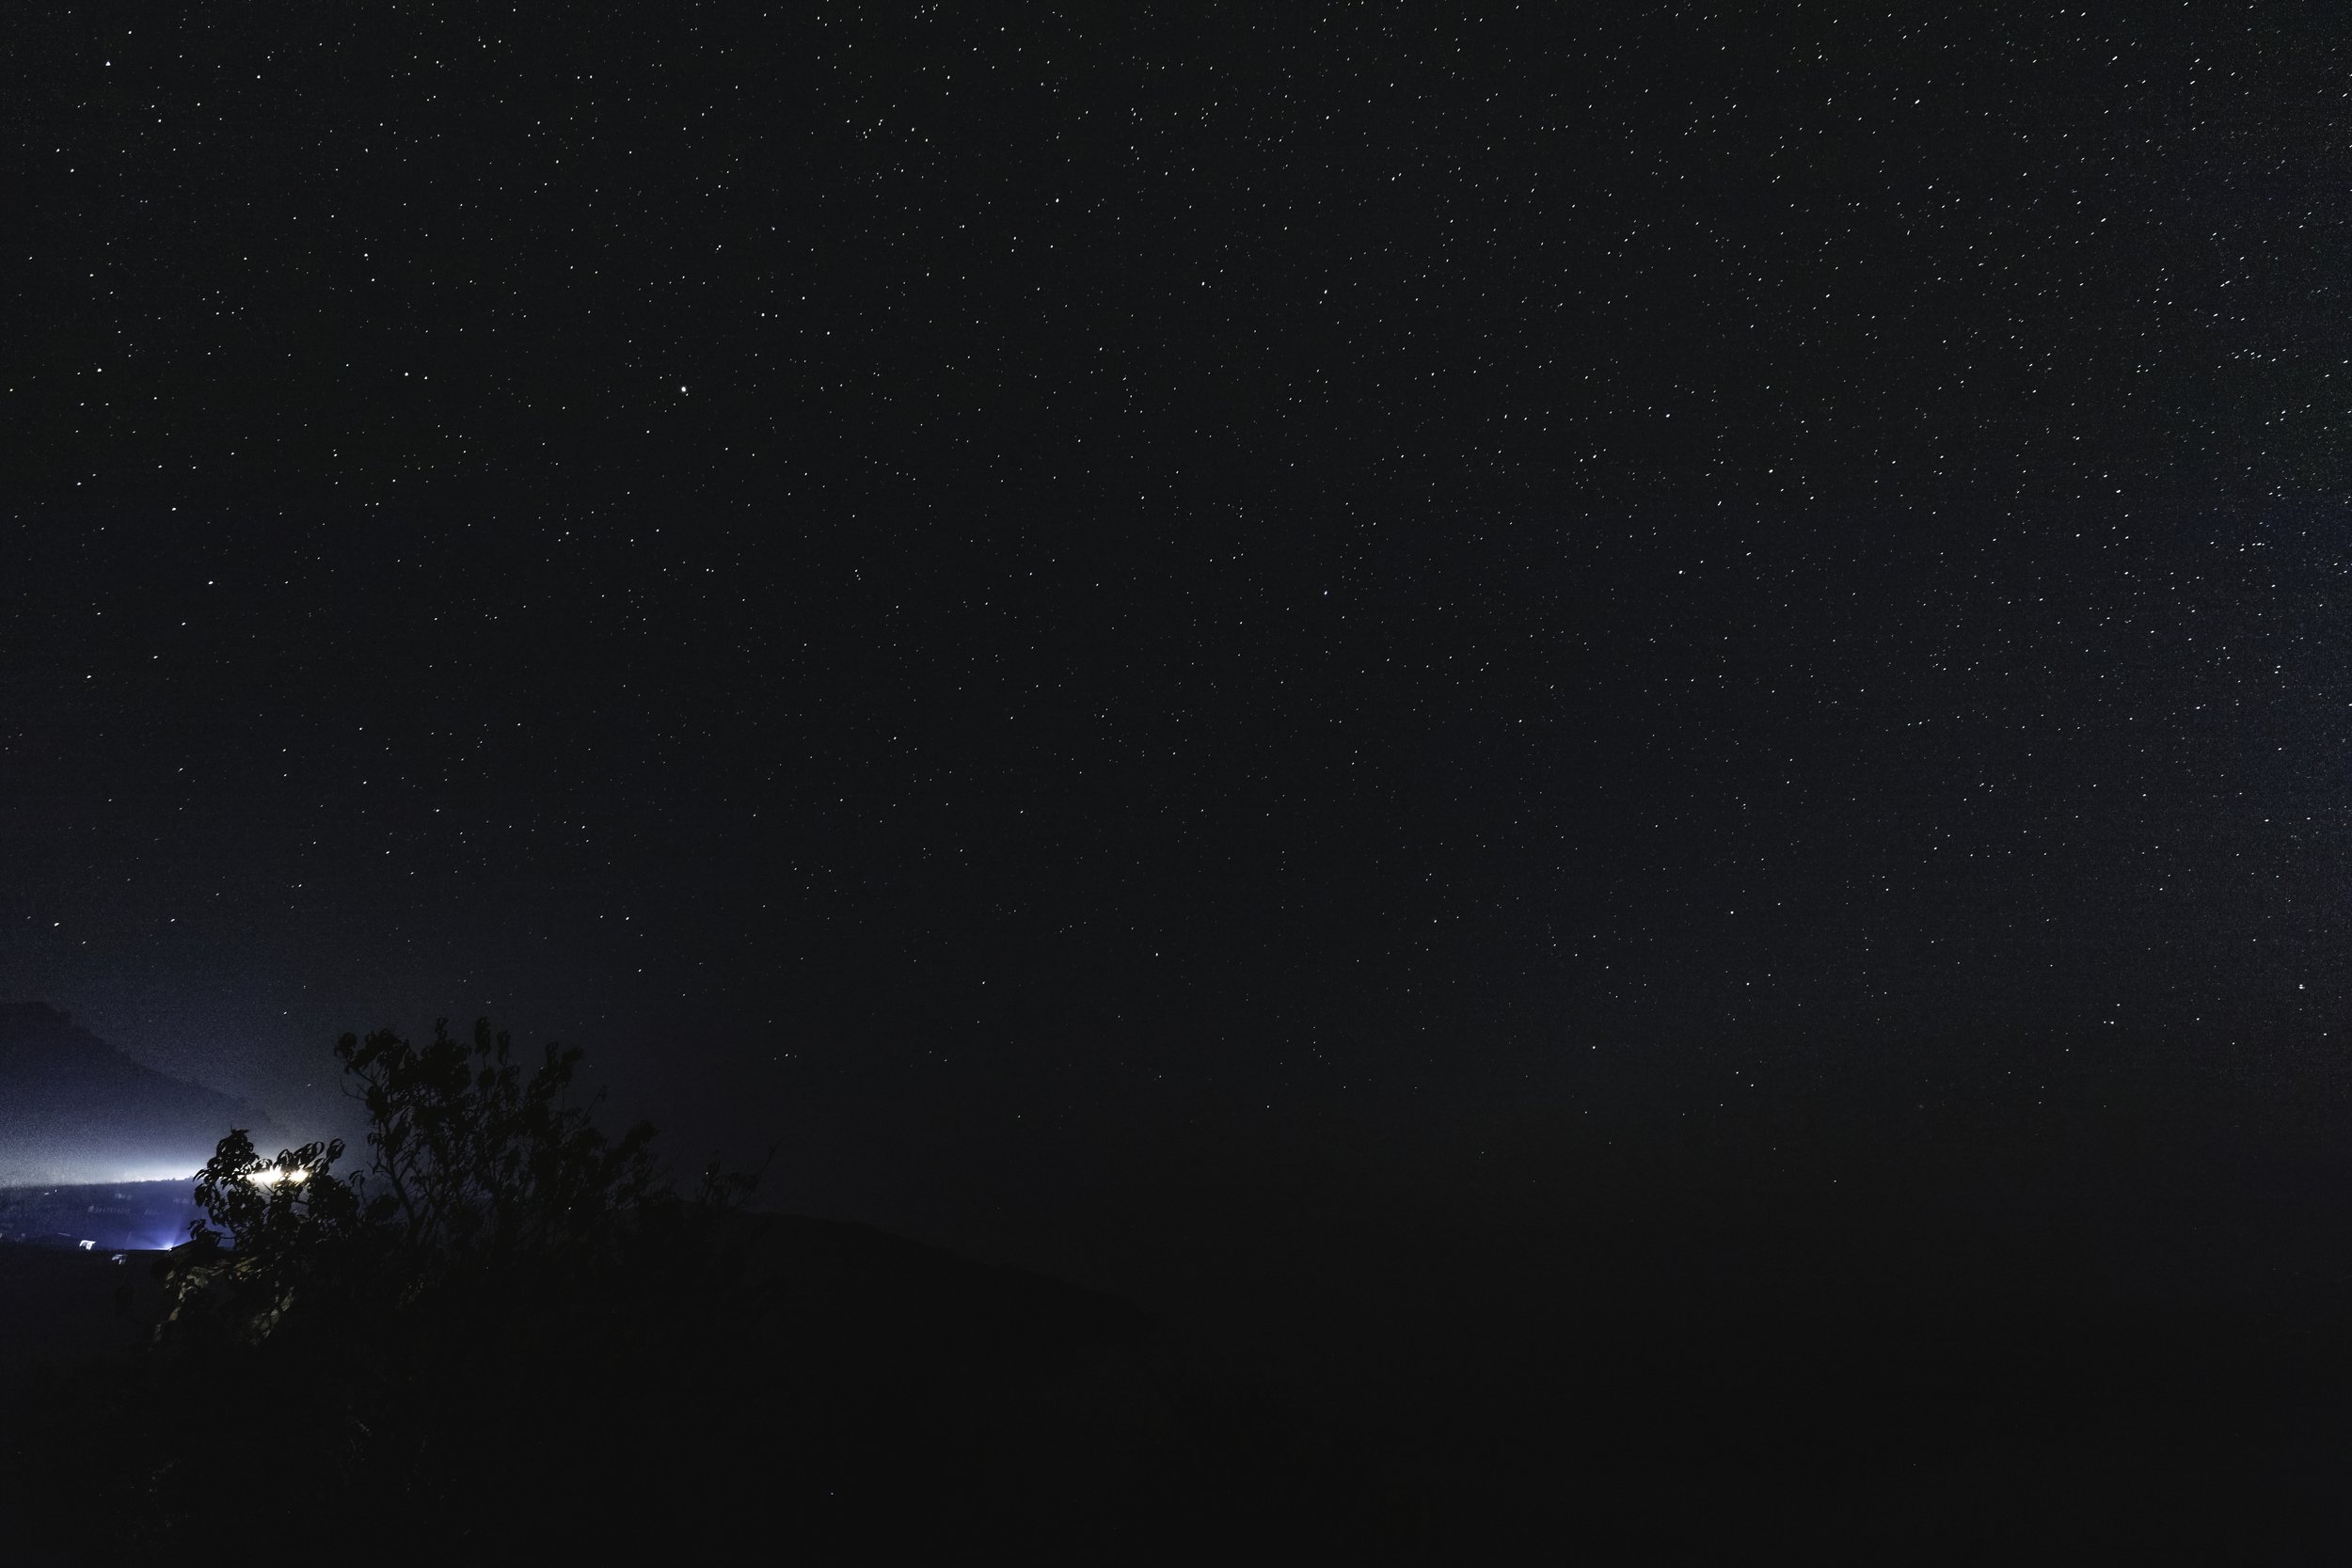
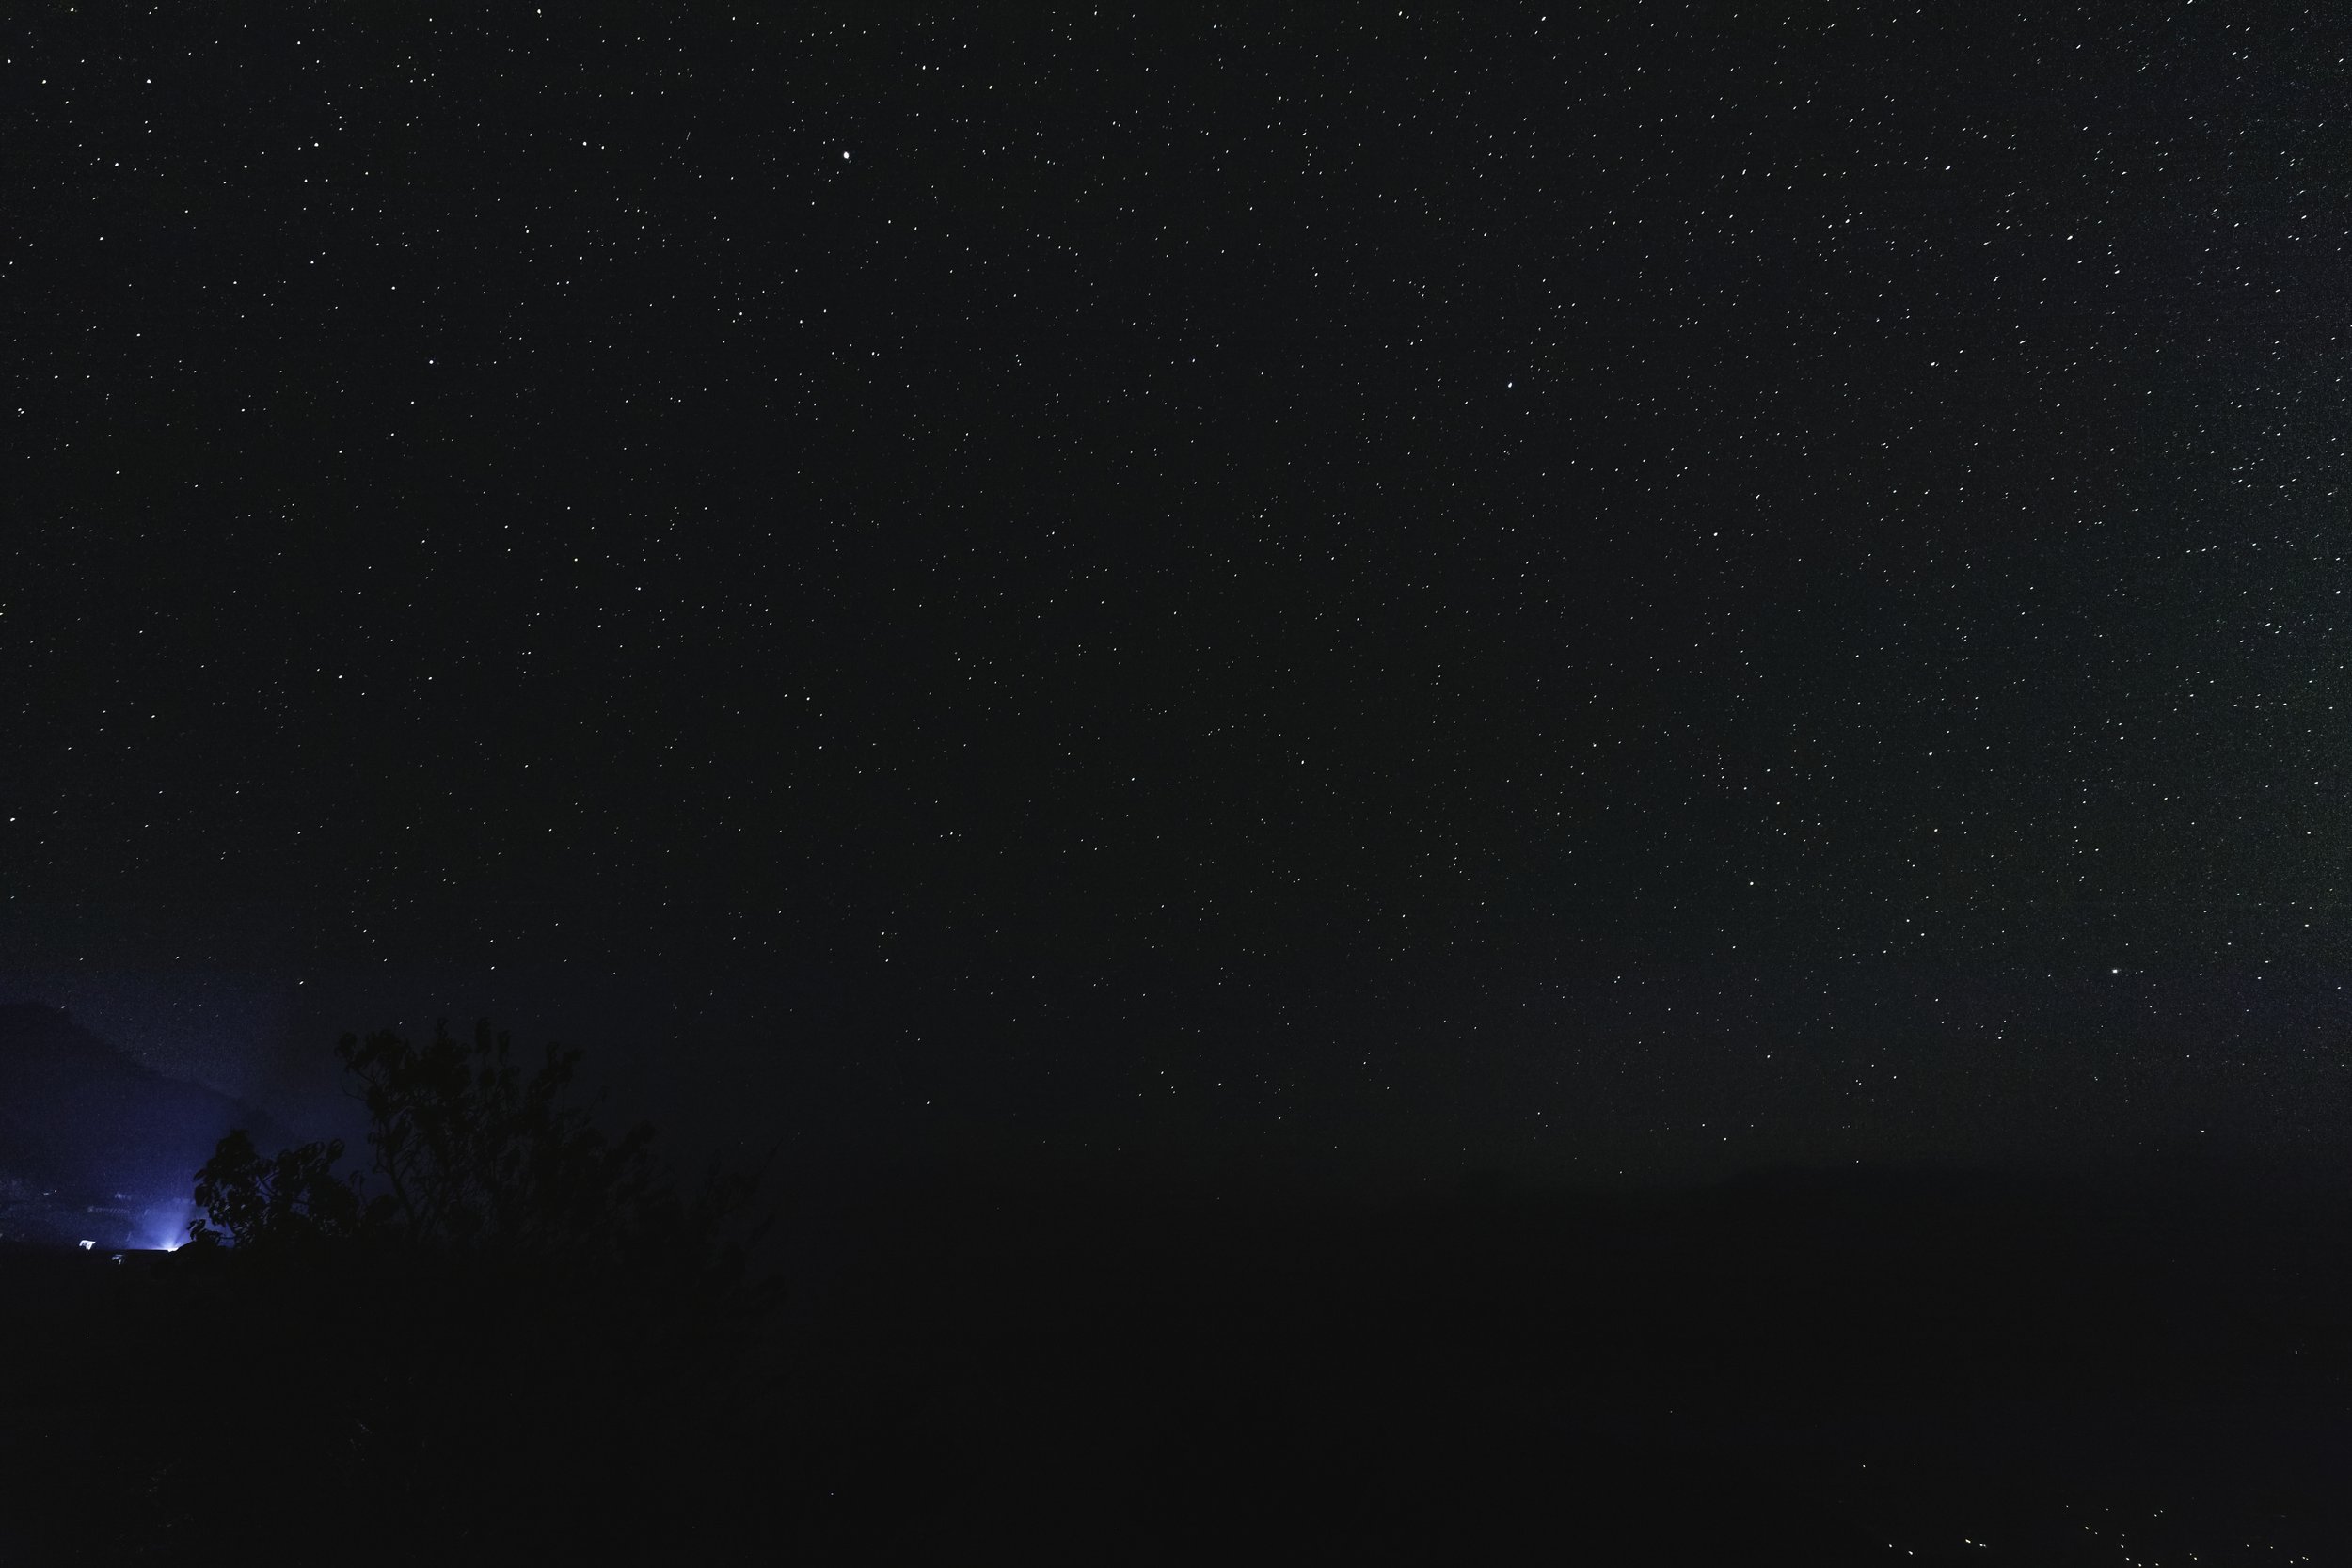
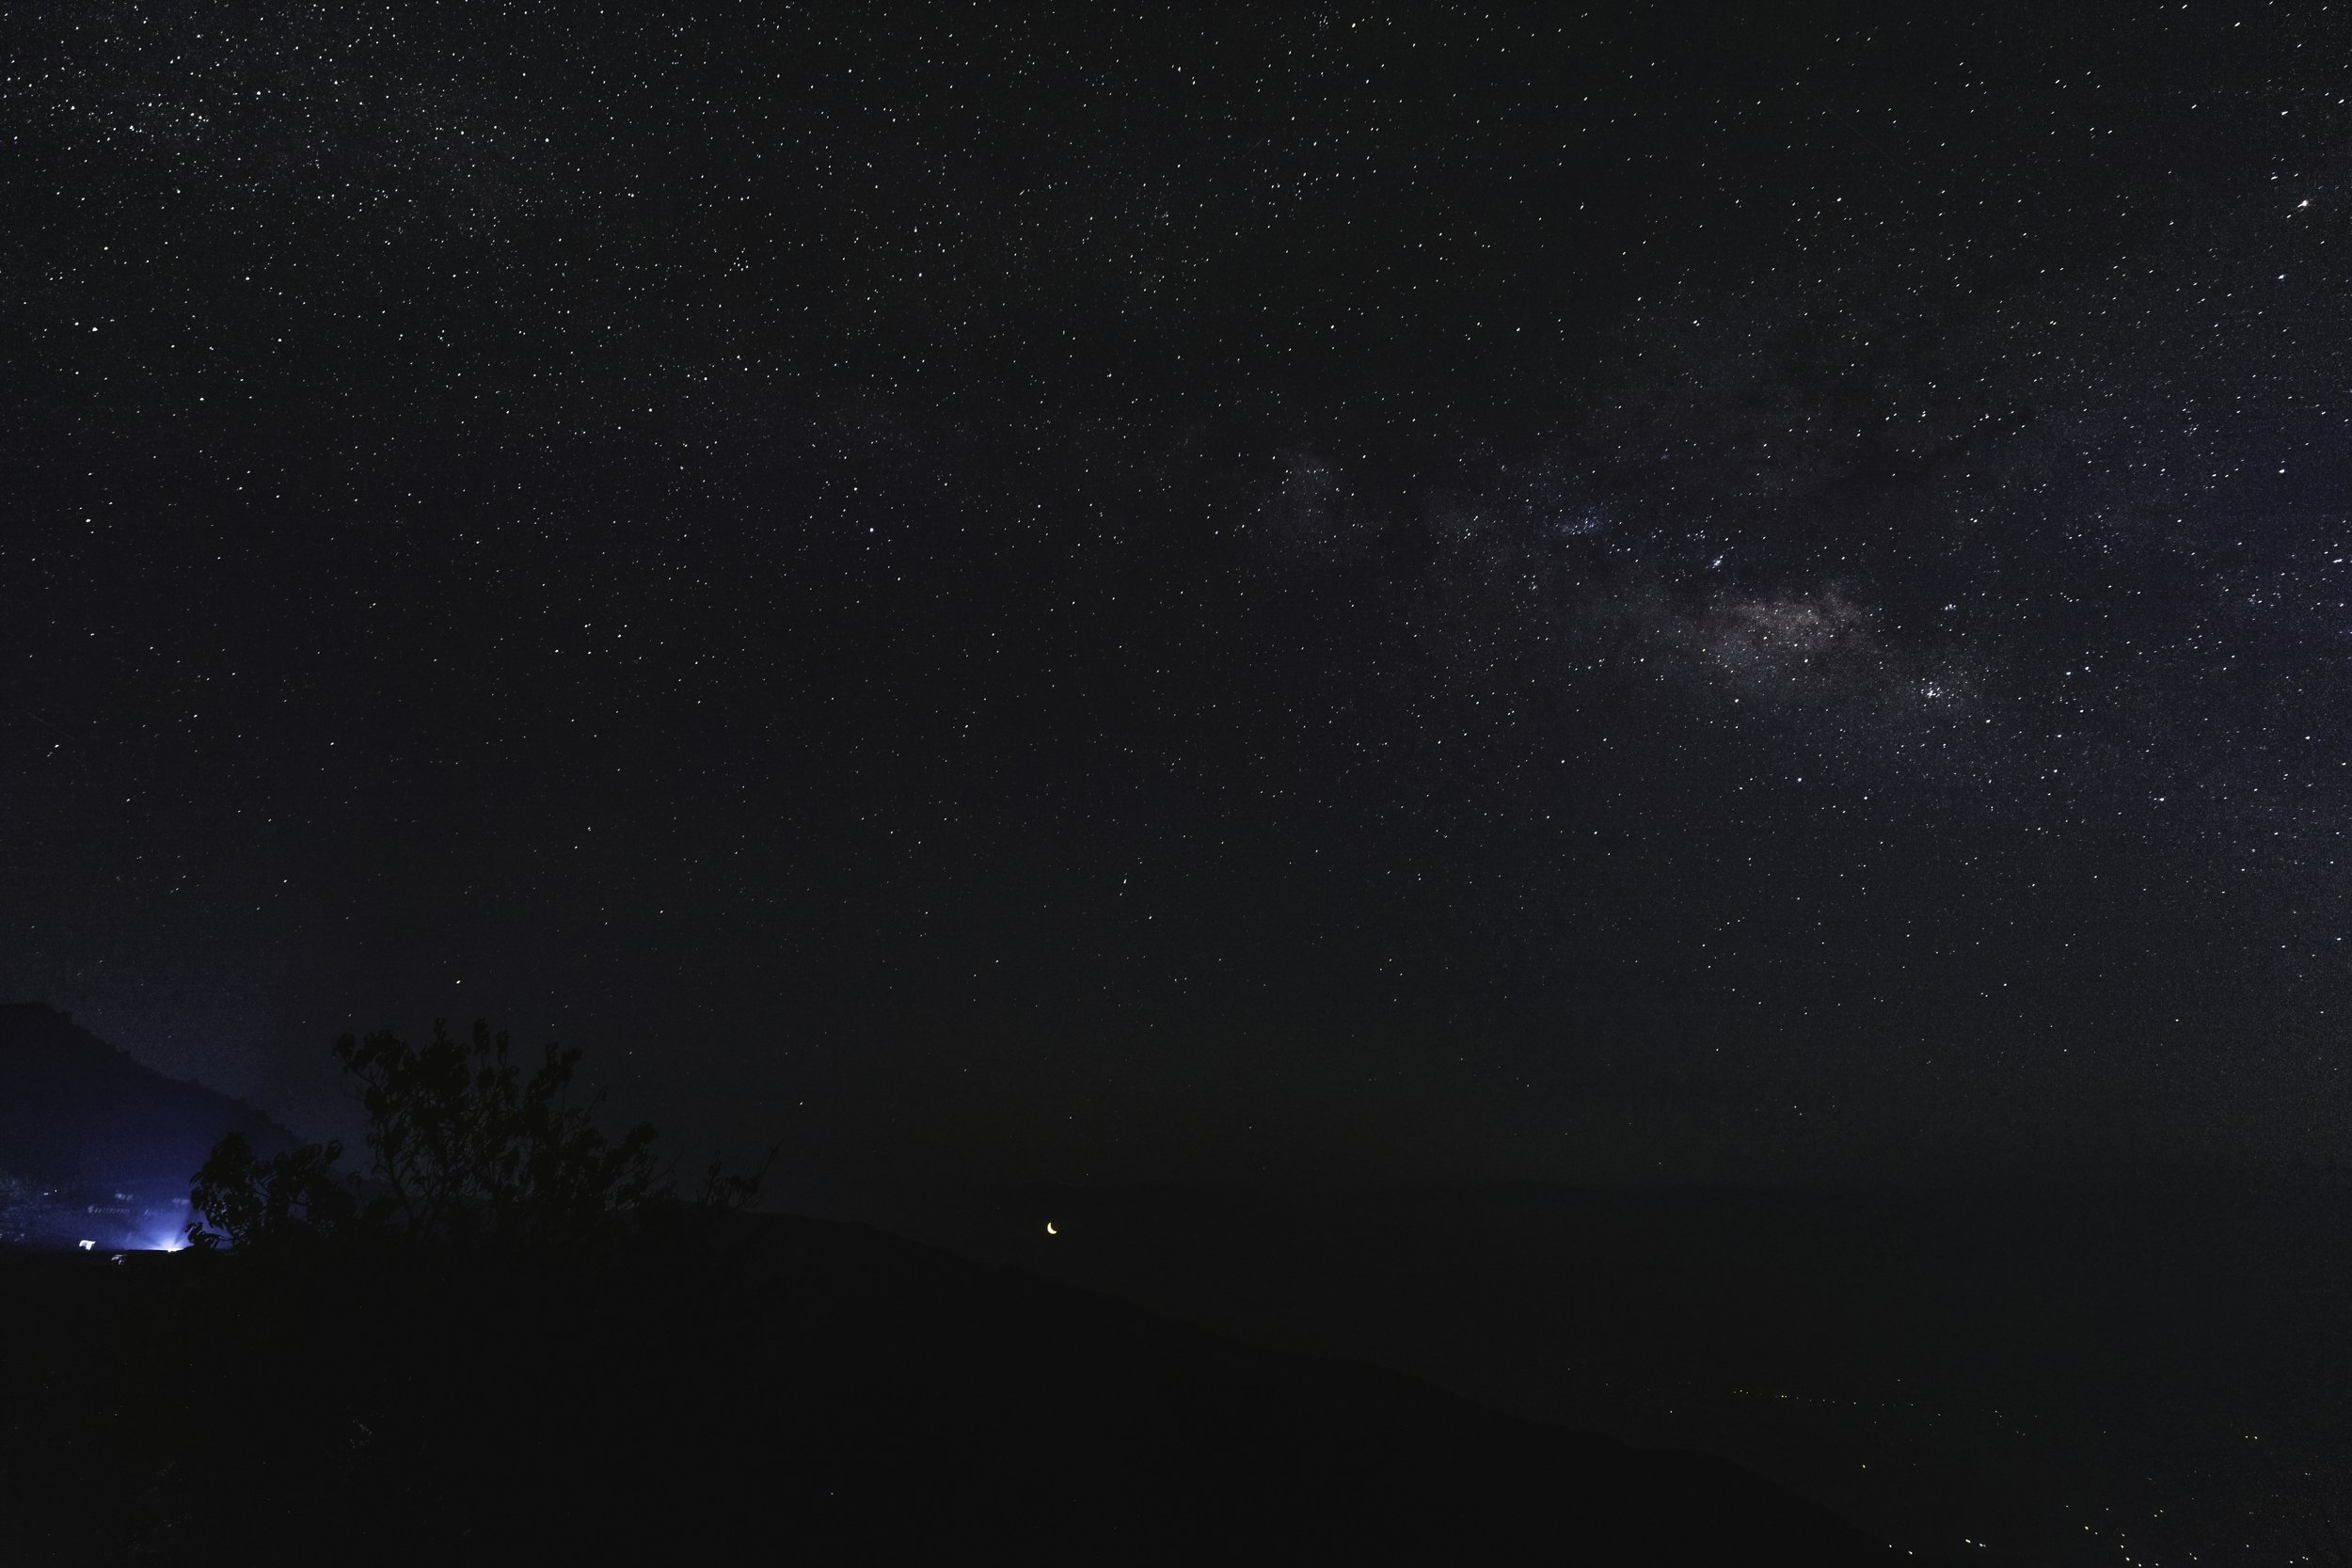
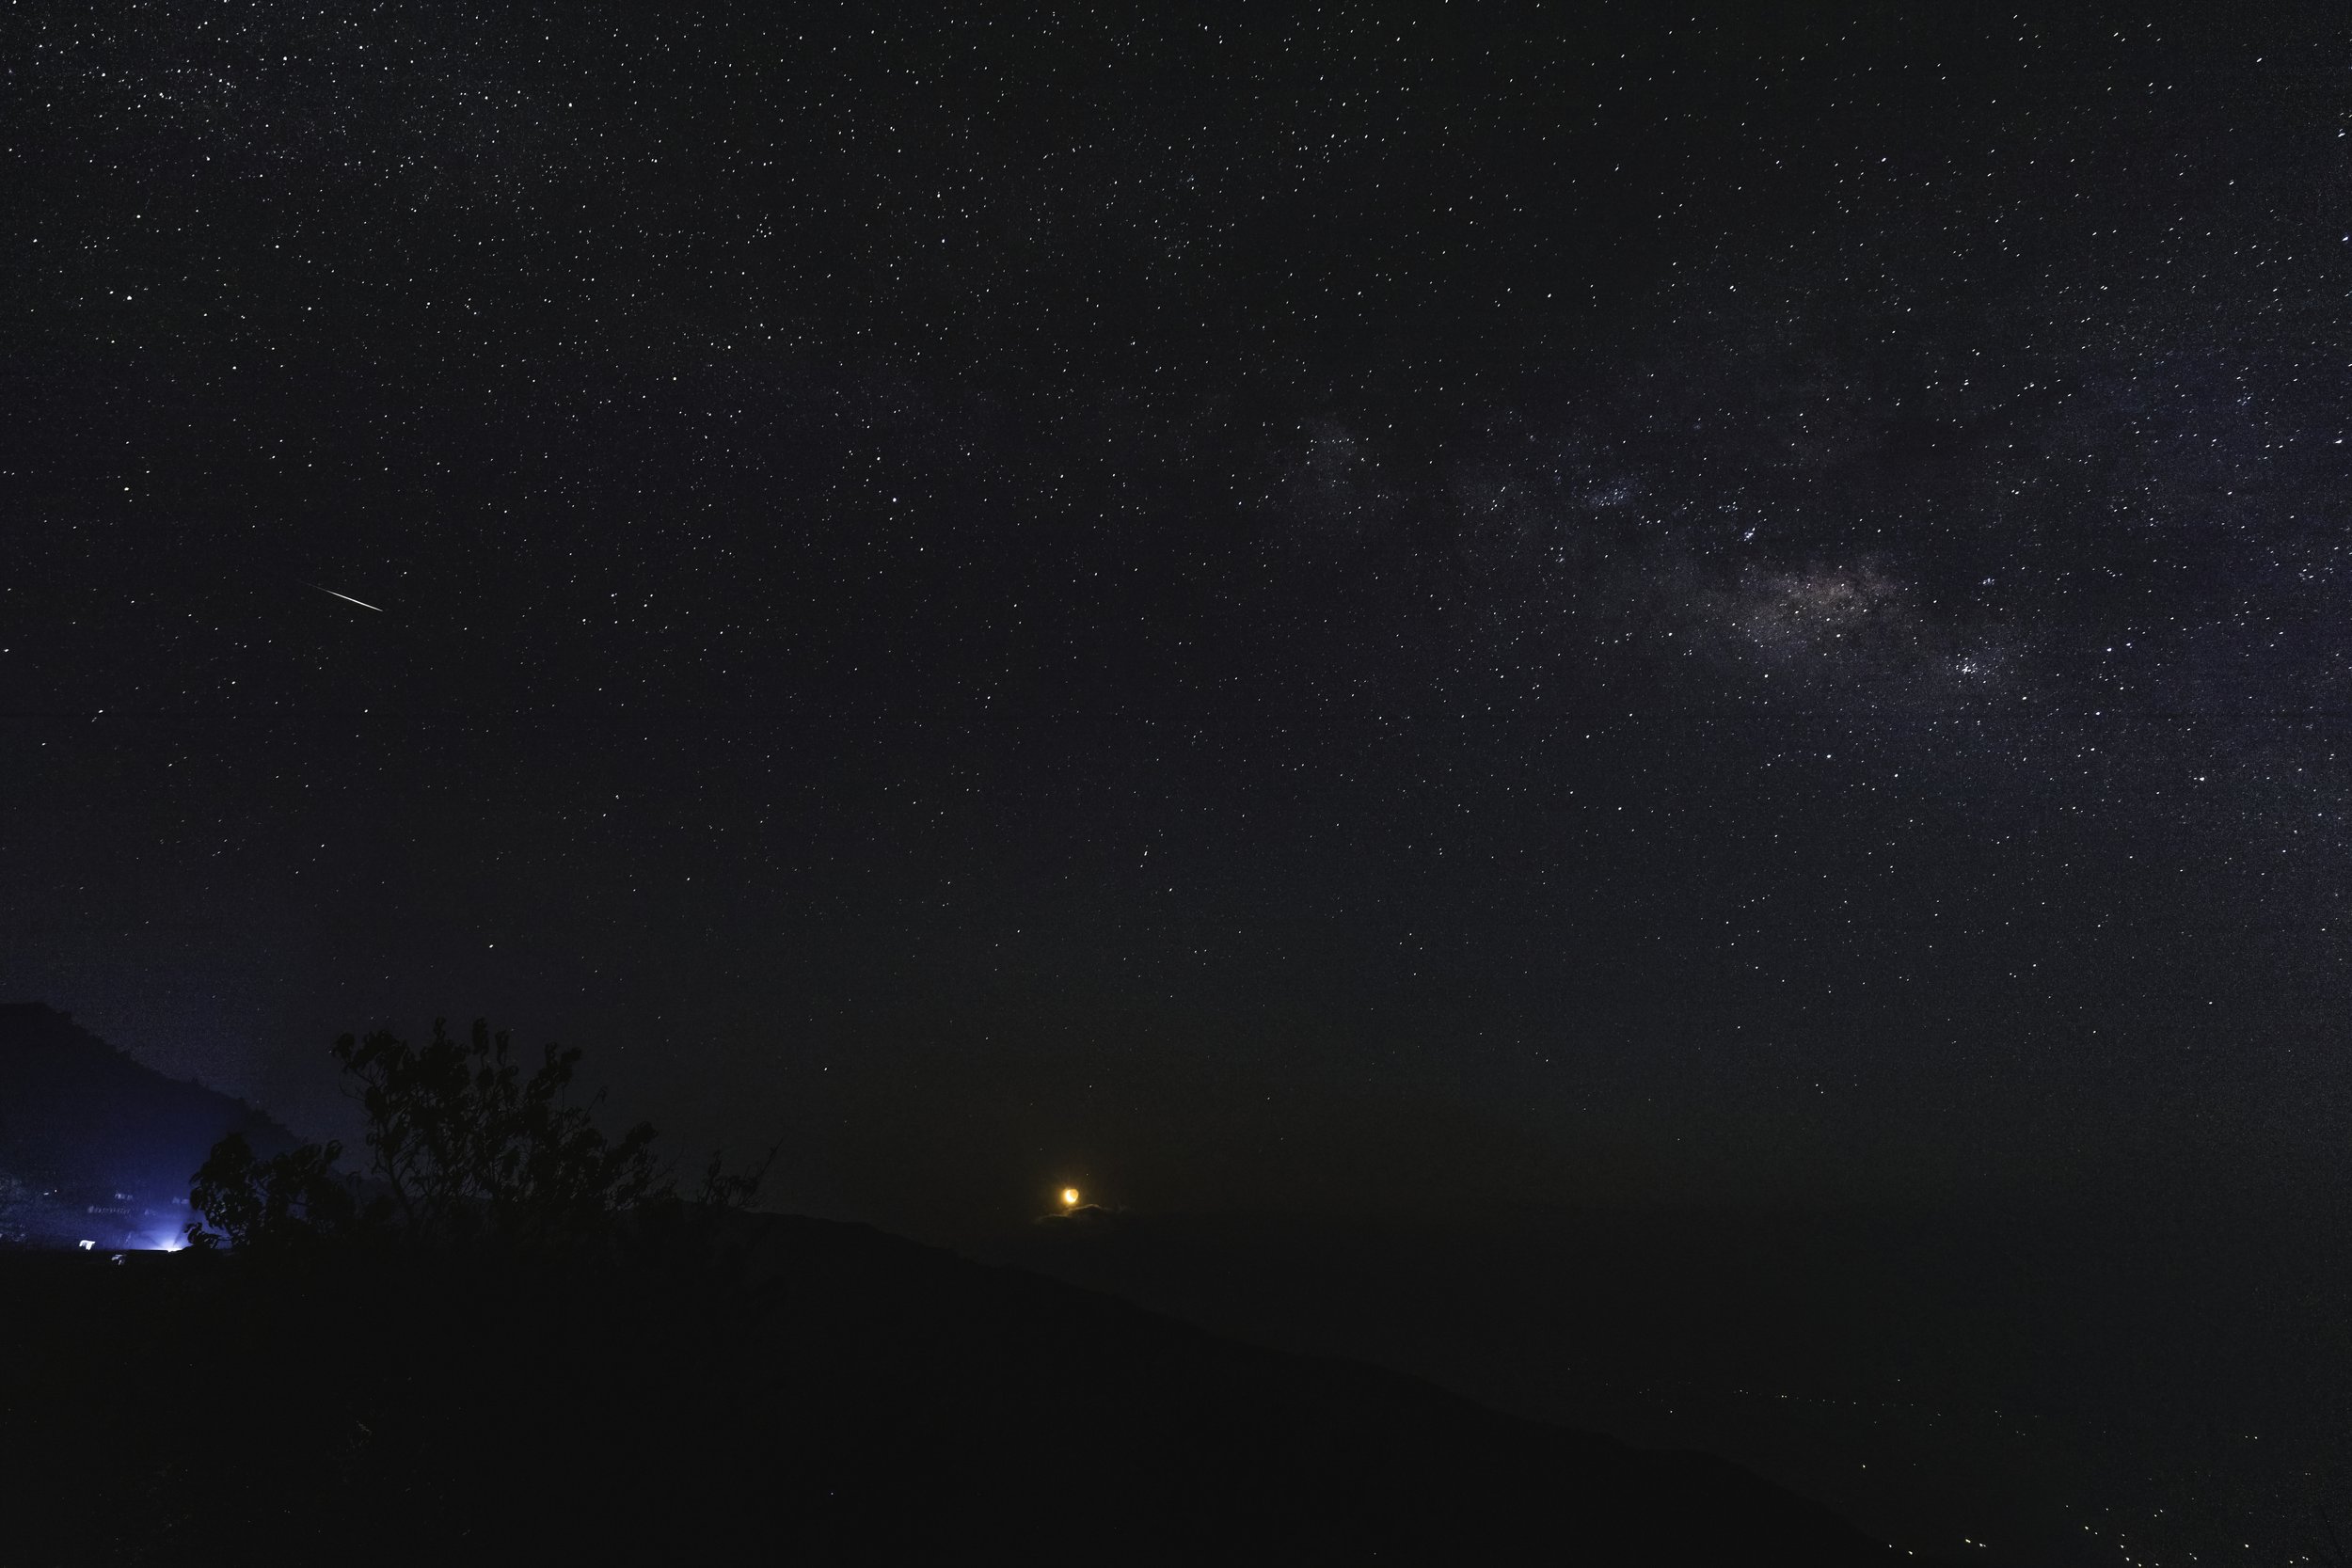
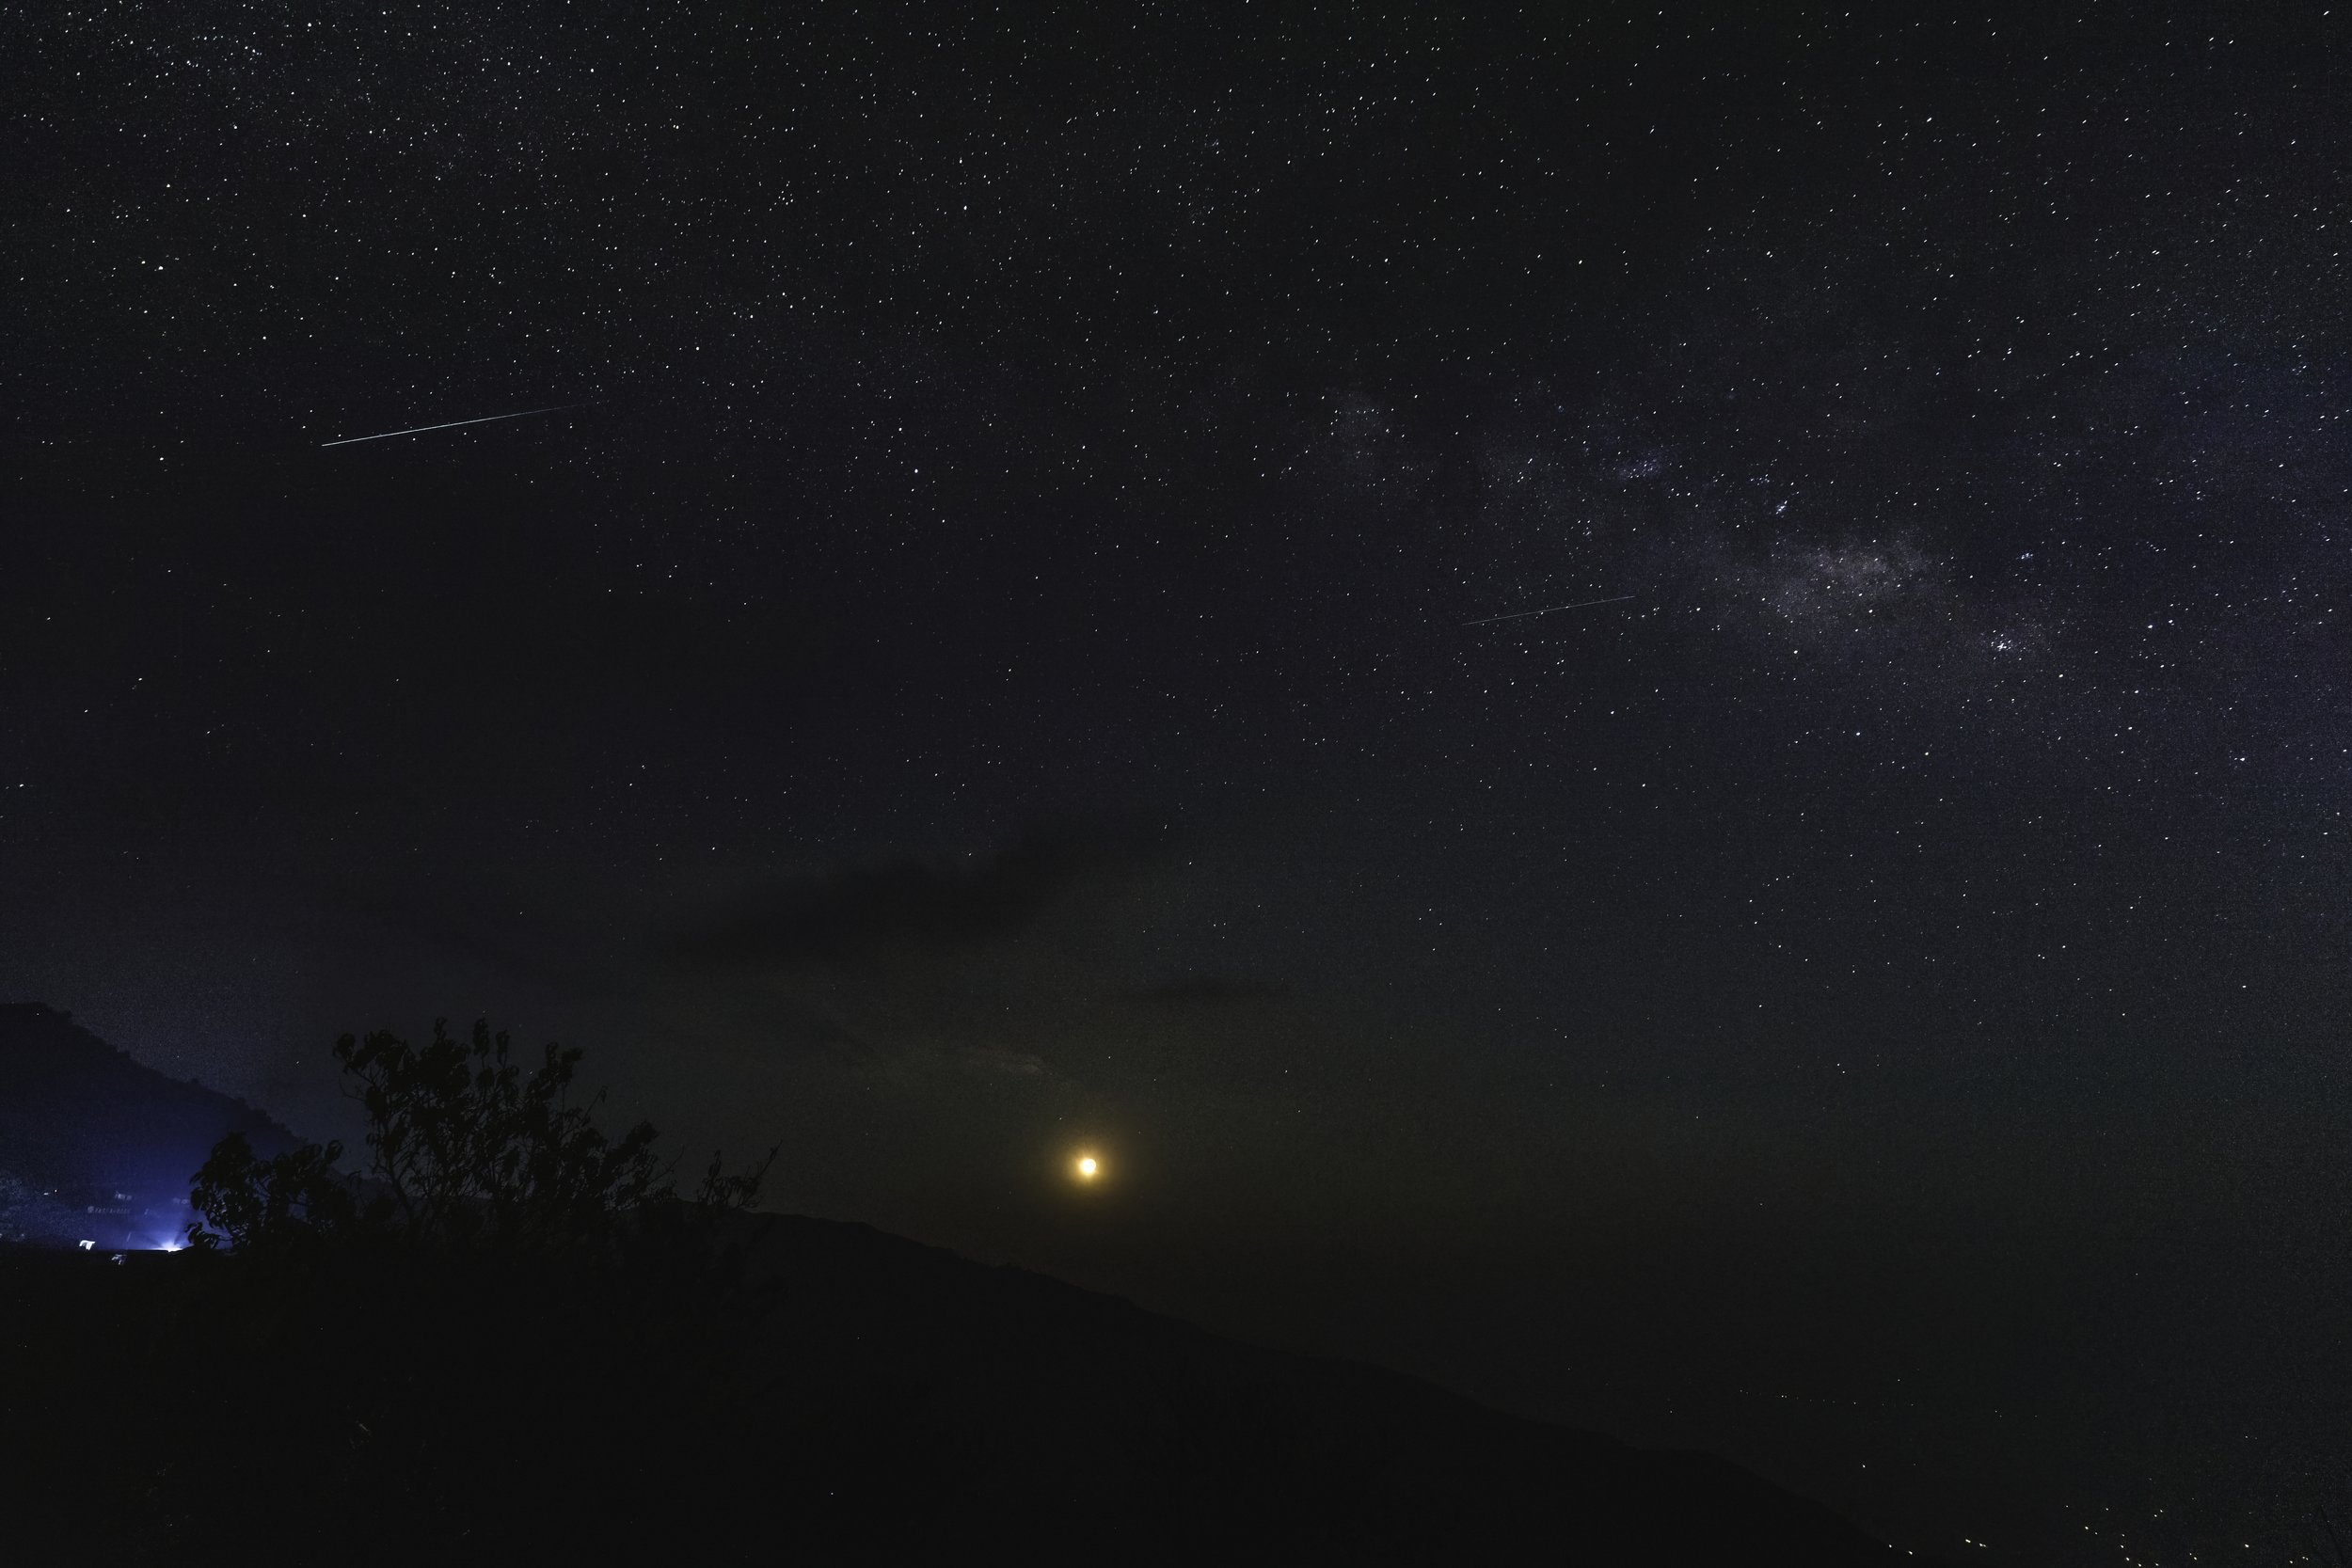
The images below illustrate the conditions and light pollution on the night of the shoot.
Temperature on the night of 26 March when I recorded the Milky Way Timelapse. Thankfully this night the wind chill was negated given the location of the village.
15% Waning Crescent of the Moon on the night of 26 March. The moon did not rise till it was almost 4am on the 27th.
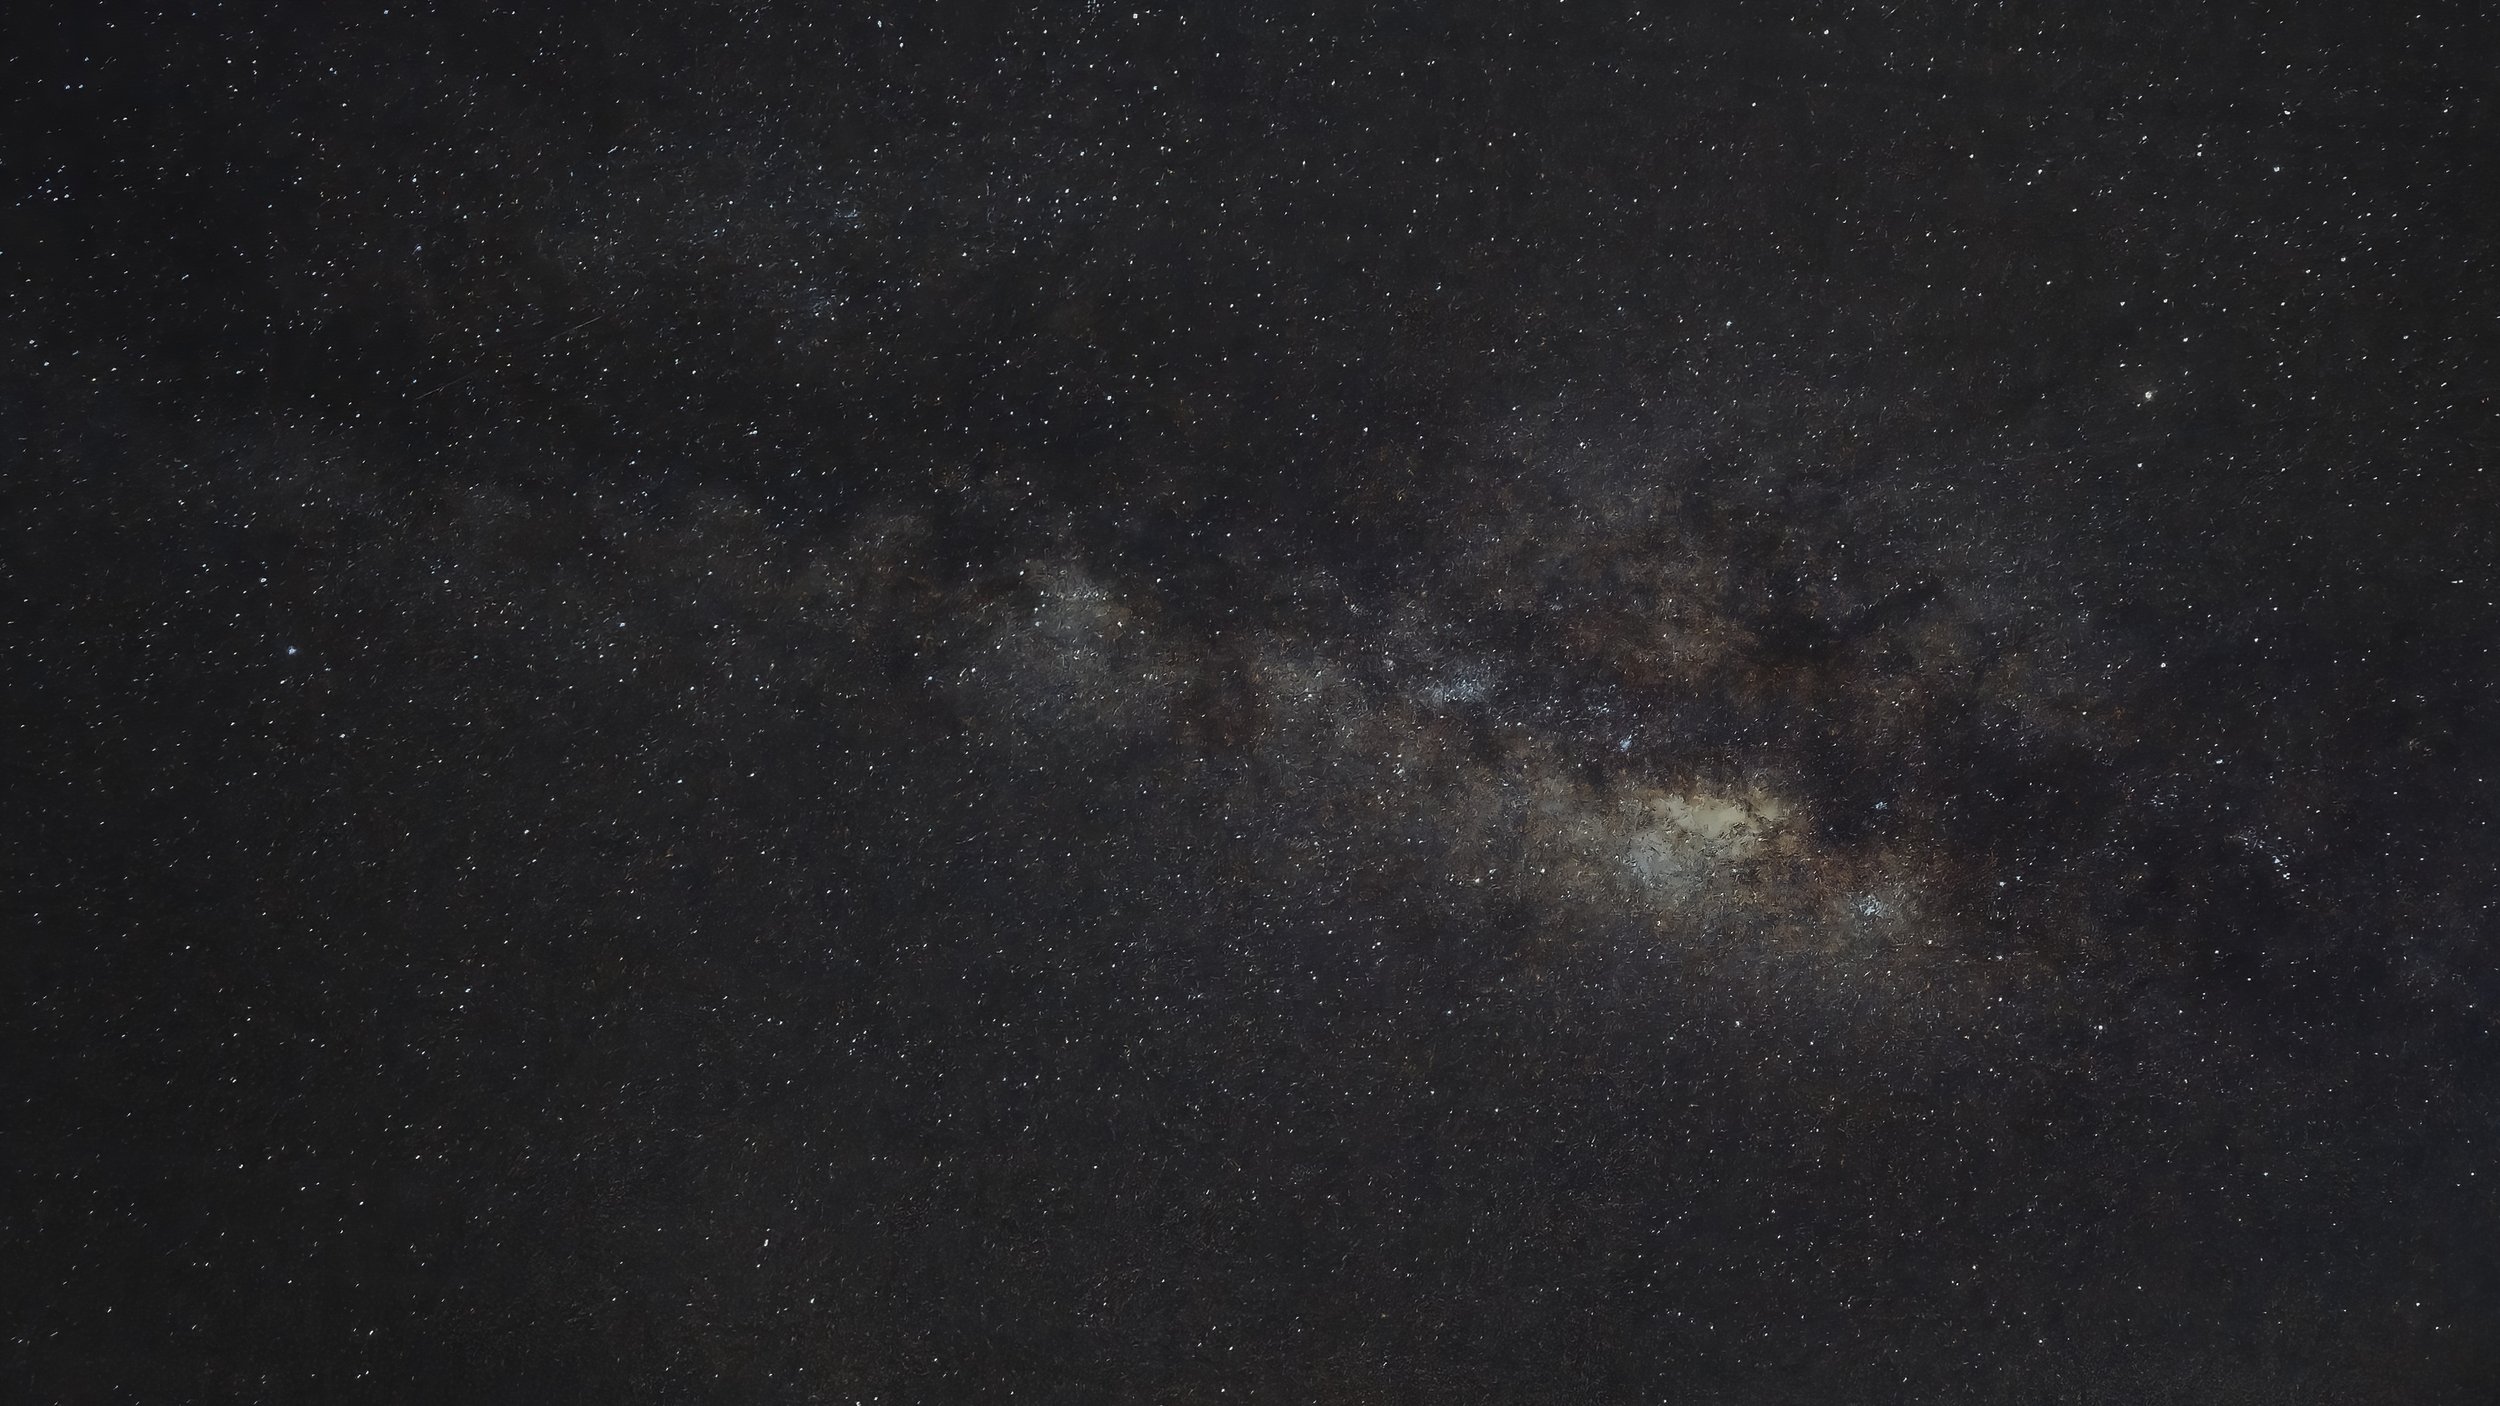
Zero Light Pollution at the hamlet of Jaubari, Ilam.

Light Pollution Map of Jaubari and the surrounding areas.
Gear for Milky Way Timelapses
First things first, what is a time-lapse? It is a technique that allows one to take a series of photos and put them together sequentially to create a video. The frames are taken with the same settings over a long period of time and when put together show movement from the same perspective in a sped-up fashion. Time Travel!!!
Time-lapses can be created using almost any camera, for example:
A DSLR or mirrorless camera
A recent smartphone
A recent GoPro or another similar camera
Most recent DSLR/mirrorless cameras now have a "time-lapse mode" which allows one to create a time-lapse very easily without any editing. Once activated, just point the camera at the the Milky Way, focus, and launch it! Me - I prefer the old fashioned way because it gives me more control and especially over the flicker.
Apart from the camera the usual suggestions are :
A wide-angle lens - Wide Angles will give a nice wide field view of the large Milky Way band. But it is not mandatory to use Wide Angles. Medium telephotos work well too.
An intervalometer - Needed to control the intervals and exposure times, unless the camera has a built-in intervalometer
A sturdy tripod - Self-explanatory. A tripod that is not sturdy will not be stable, especially if the weather is extreme.
A ball head - This allows to angle your camera
[Optional] A star tracker - This helps to follow the Milky Way band and leverage some extremely long shutter speeds leading to more details and using a lower ISO.
A clear sky is one of the most important things to watch for when planning a Milky Way or Star Trails photo and/or timelapse. In order to make the most of the opportunity, ideally try on a completely clear sky for the duration of the shoot. I would highly recommend using Clear Outside charts to help pick a good night. These charts can be a bit difficult to understand at first glance but basically, the more rows of dark blue squares, the better. Once the weather is sorted, I typically switch over to PhotoPills to start planning and work out what I can include in my frame with some help from Google Maps - and the PhotoPills Academy has some amazing tutorials for beginners and advanced shooters along with a ton of very useful tools. Another awesome app is THE PHOTOGRAPHER'S EPHEMERIS which also provides numerous resources and tools to help plan the shoot. Both PhotoPills and TPE are excellent.
Capturing Milky Way timelapses doesn't require expensive gear. Personally, I would recommend using a Full-Frame camera and a choice of lenses ranging from wide angles to medium telephotos. Wide angles will allow a large portion of the sky with a foreground to be captured while telephoto’s will help get details views with or without a foreground. Here are examples of both I have captured from different locations and different light pollution conditions - Wide Angle | TelePhoto. Also I personally avoid all the software gimmickry and shoot what I want and how I want in camera and at the location unless I am tracking the Milky Way.
If the camera does not have a built in intervalometer, a third party remote with this capability will be required. I use a few triggers which you can find in my Kit Bag - Accessories.
Of course, you'll also need a sturdy tripod and ball head to make sure the camera does not move over the hours. I have listed what I typically use above. A large, fast memory card is also recommended as timelapses involve shooting potentially hundreds of Long Exposure photographs one-after-the-other for up to 6 hours straight or even longer as in this case! We cannot afford to have our memory Card get bogged down, as it will completely mess up the interval. I prefer the Prograde CFast™ 2.0 Cards. These are high performance cards with blazing read and write speeds verified to perform at a sustained read rate of up to 550MB/second and a sustained write speed of up to 450MB/second. And thankfully they have never failed me yet on any of my expeditions - be it wildlife or landscape or astrophotography. I also have a few spare Lexar and Sandisk cards of similar sizes and speeds as a fail-safe.
Exif: Canon 1Dx Mark ii | EF16-35mm f4L IS USM @ 16mm | f/4 | 19 seconds | ISO 800 | Manually focused with a Bahtinov Mask & WB set to Manual at 3800k.
I took this handheld after I completed the timelapse. A stack of 3 light frames and 25 dark frames stacked in Starry Sky Stacker and post processed in Siril, Photoshop & LightRoom. I had to use multiple programs to eliminate the gradient caused by the Moon Light from the bottom left of the frame and the minor light spill caused on the right of the frame from a neighbouring LED light.
Camera Settings
First and foremost - there are no “default“ settings when photographing the Milky Way or Star Trails. But ideally before starting to photograph, one will need to decide the look of the final image - usually this involves the ISO and the level of Light Pollution at the location. Shooting at an ISO of 1000 or lower, as I have done here, will create low noise images but might impact the visibility of the Milky Way if there is light pollution. Usual suggestions are around ISO 3200 to ISO 6400. But I would recommend look at the sky and look at the surrounding light pollution and decide on the ISO accordingly. You can see a High ISO Milky Way TImelapse from Light Polluted areas here.
With that said, here are some preferred settings to get you started:
Always shoot in Manual and in RAW to get the most amount of information
Focus on the stars Manually. Turn off Auto Focus. Turn off Lens Stabilization.
Preferred Aperture: f/2.8 or f/4 or the lowest possible aperture
Preferred ISO: I have varied from ISO 800 under Bortle 1 skies to ISO 3200 in Light Polluted skies (Higher ISOs can be used depending on the ambient light pollution)
Shutter Speeds: Depending on the camera - Full Frame or APSC - and the lens used - Wide Angles will have more time.
White Balance: Between 3000 - 5200 Kelvin (Please DO NOT leave on Auto)
Long Exposure Noise Reduction - OFF
Many people recommend using ISO 3200+ when shooting at night. However, this has the potential to clip the highlights (stars in this case). Since our entire image is focused on the stars and the Milky Way, this isn't a good idea!
The best part of Milky Way photography is the amount of flexibility it provides. A number of different techniques can be used and each will always result in a great final image. A word of caution though - be aware of the interval between the individual photos. If the interval is not set properly it will lead to some serious issues while creating the timelapse. Always set the shooting interval to one second longer than the shutter speed.
However some camera brands are programmed differently, and they require a 1 Second interval. Therefore, if the shutter Speed was 20 seconds, the interval would simply be 1 second. If a 21 second interval is used in this case, it would result in a large gap between each photo. Therefore before heading out for the night, determine which way the camera works! The interval will either be 1 second longer than the shutter speed, or just 1 second. Try both options and see what happens. If the camera goes "click..click" it indicates that the exposure ended and another one began. If only one "click" is heard and then a long pause, the interval isn’t set properly.
Now all is set and the only thing needed is spending the hours needed to get the photos. The more the number of exposures, the longer the timelapse. For this Timelapse of the Milky Way Rising I took 1256 photos over 7+ hours.
Post Production
I prefer a few programs to create my Timelapses and my favourite one is LRTImelapse. But for these timelapses from Singalila I have simply used it to mitigate the flicker during the timelapse. For the most part I have done my initial edits in LightRoom and then created the video in Premiere Pro and edited the final video there.
In conclusion, Milky Way & Star trails photography is fascinating, and it should be attempted by everyone at some point and it isn't just static photos, time lapses are a lot of fun to shoot and create. These help to get a sense of our place in the universe with a stunning visual of our galaxy's core by the bright band of milky clouds and stars moving across the sky.
‡‡‡‡‡
A gallery showcasing the night’s journey


Related Posts


